
One of the main features of the Uptrends monitor service is Alerting: when errors are detected for your monitors, you’ll be notified by alert messages.
In the Uptrends app this works as follows:
If a monitor check results in a confirmed error, an alert is generated in the Uptrends app. An alert then triggers sending a message to an operator or a third party application.
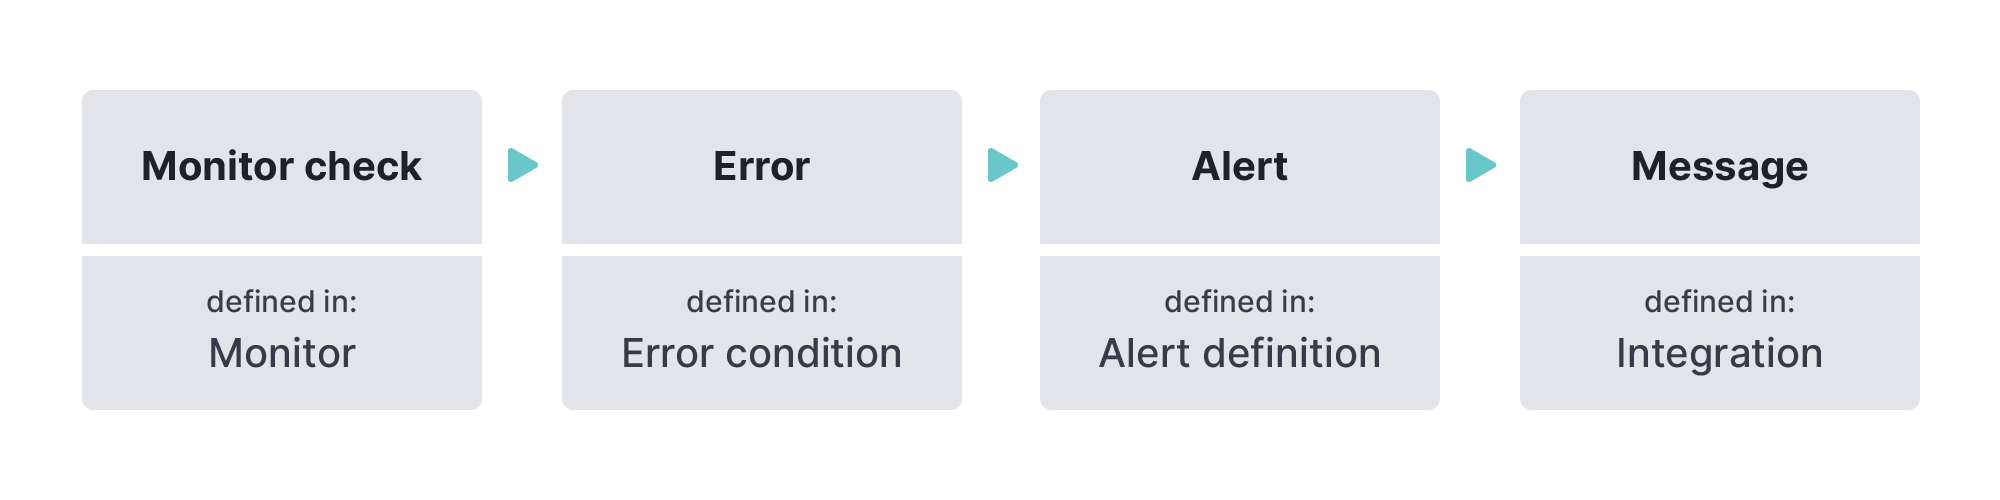
To make this happen, these four definitions must exist: monitor, error condition, alert definition and integration. They specify if and when an alert is created and which kind of message is sent.
In this article we’ll cover the basics of how a monitor check turns into a message.
Monitor checks
It all starts with the monitor checks that run at the interval defined by you. The monitor checks include some standard checks which depend on the monitor type, like availability. In addition you can define your own error conditions, like a load time limit or the page content match.
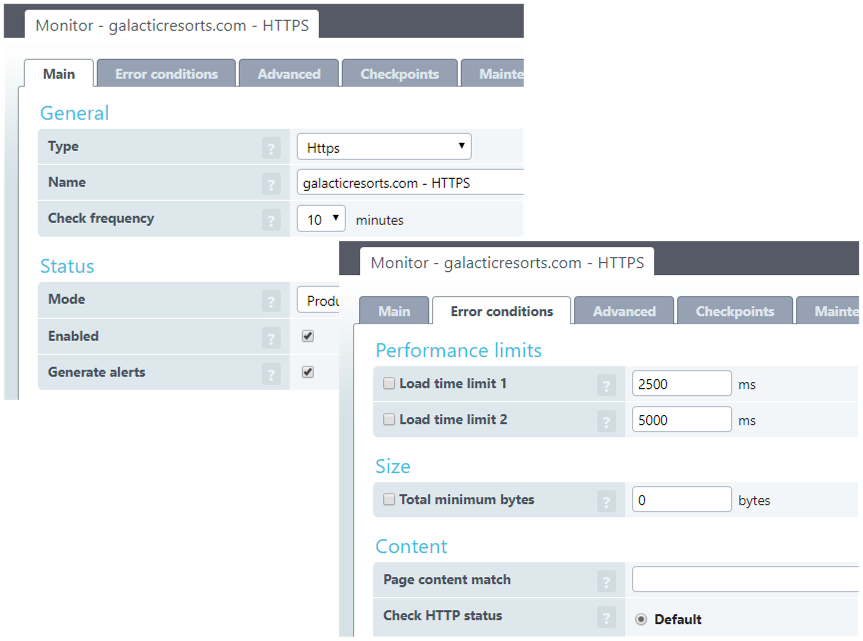
The knowledge base article Error conditions explains how to configure the error conditions in more detail.
If the monitor check finds a problem, because the standard checks fail or an error condition is met, an error is signaled.
Errors
All errors are shown in the Errors overview (menu item Dashboards > Synthetics - Errors overview). You can change which types of errors you want to see (OK, unconfirmed, confirmed) and you can set which time periods you want to look at. These settings can be done for the whole dashboard at the top of the dashboard. In addition you can set this for each dashboard tile individually. Hover over the top right corner of the tile to get to the tile settings.
The following example Errors overview shows unconfirmed (marked yellow) and confirmed (marked red) errors for the last month:
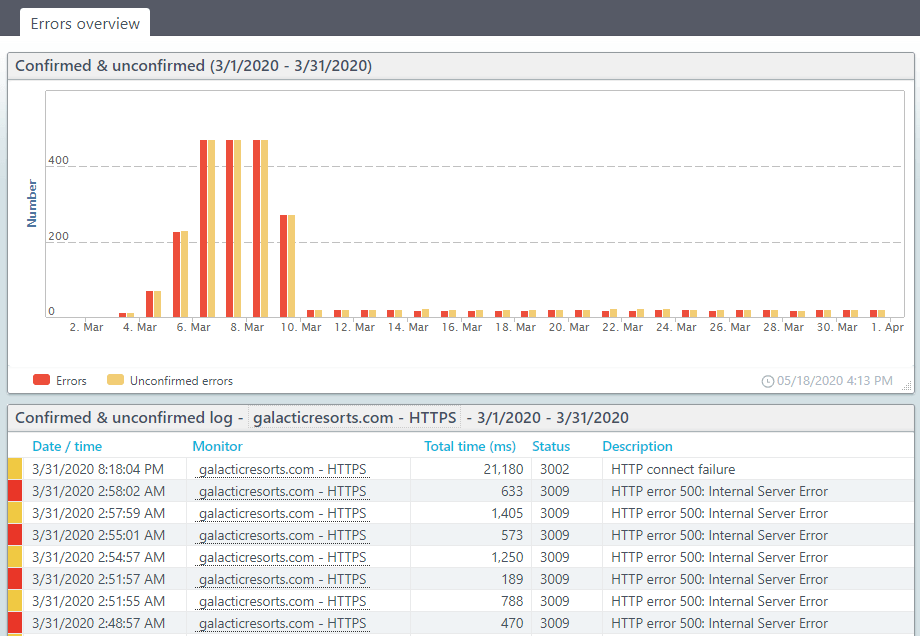
The first occurrence of an error is called an unconfirmed error. This could be just a temporary situation or a problem with the checkpoint. Therefore a second monitor check is done from another checkpoint. If the same error is reported, the result is a confirmed error. Only confirmed errors can lead to alerts.
More information on this principle can be found in the article Unconfirmed and confirmed errors.
Sequences of errors
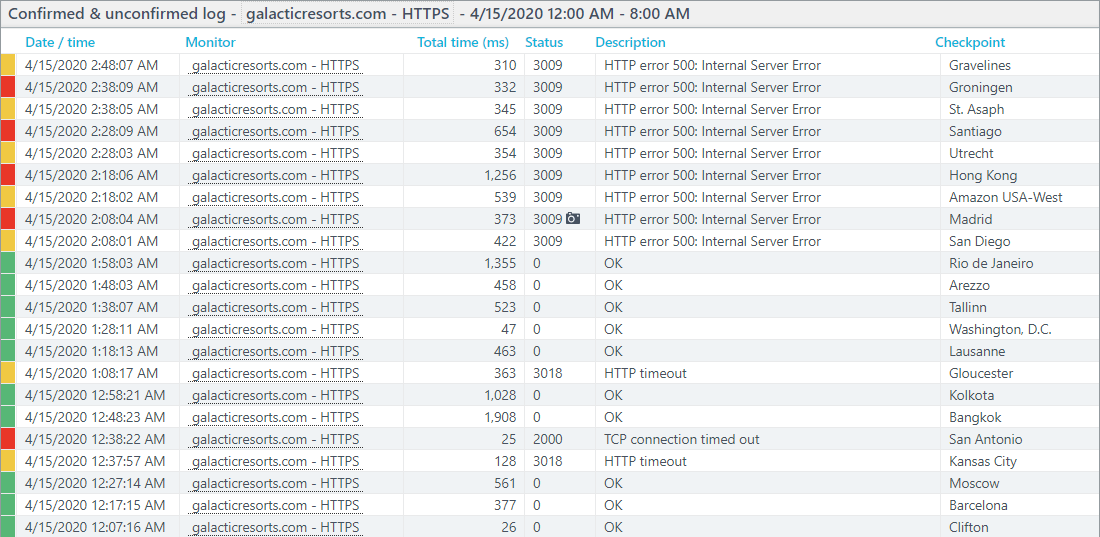
There are different scenarios for a sequence of errors, which are shown in the image below:
- An unconfirmed error followed by an OK result. This will not lead to an alert.
- An unconfirmed error followed by a confirmed error, then an OK result. This will result in an alert, if your alert definition is set to “generate an alert when 1 or more errors have occurred”.
- A number (n) of unconfirmed/confirmed errors occur in a row. This will result in an alert, if your alert definition is set to “generate an alert when n or more errors have occurred”. Alternatively you can set a time limit for errors. If the sequence of errors reaches that time limit, e.g. the errors occur for more than 5 minutes, an alert is created.
Alerts
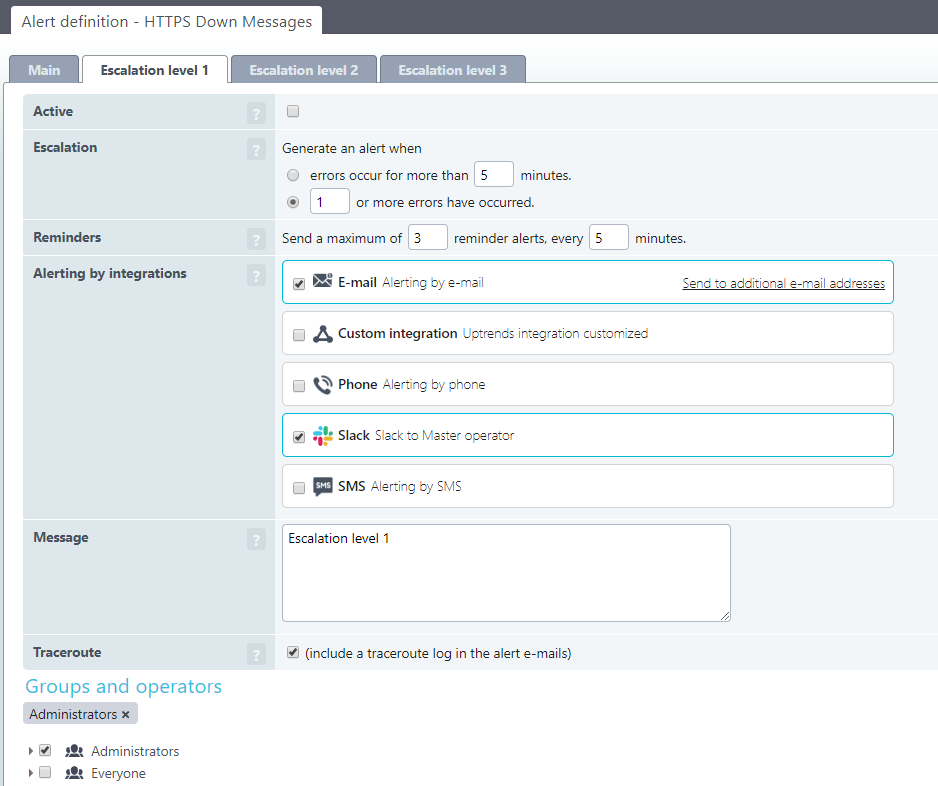
The alert definition controls the generation of alerts for different escalation levels. The escalation levels are used to create alerts in stages and to notify the selected operators in the right way, taking into account the urgency of the problem and the increasing urgency, if the problem persists.
For each level, you have to set whether an alert is created, which operator (groups) will be notified, when a time limit is reached (errors occur for more than x minutes) or an alert is created after a number of error occurrences (one or more errors have occurred). All of the errors have to be confirmed errors. Unconfirmed errors are not taken into account for these conditions.
In addition to the original alert, you can generate one or more reminder alerts. You have to set the maximum number of reminders and the interval at which they have to be created. This option is available for each escalation level individually.
The knowledge base articles Creating alert definitions and Alert escalation levels contain more information on alert definitions.
Note that, the monitor has to have Generate alerts turned on in order to generate alerts at all.
When the error was resolved (meaning that the same check has returned OK instead of an error) a recovery-alert (OK alert) is created.
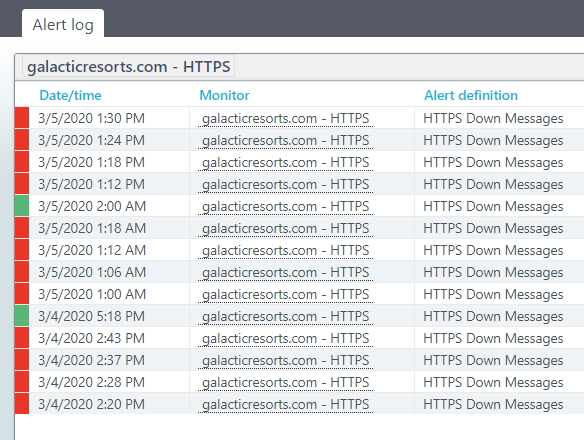
All the alerts are shown in the Alert log (menu item Alerts > Alert log). The alerts based on an error are marked red and OK alerts are marked green. As long as the error is not resolved and no recovery alert is generated, the alert is an active alert. The active alerts are listed on the Alert status dashboard (menu item Alerts > Alert status).
Looking for a specific Alert definition you’ve created? You can use Uptrends' Search to quickly find it.
Messages
At this point you already have a basic alerting system. The alerts appear on the alert status dashboard. To notice an alert situation, your operators would need to look at the dashboard continuously.
You can further automate the alerting by sending messages to people or systems to inform them about the alert situation. In that case, you need to set up integrations and escalation levels (in an alert definition).
You define escalation levels to configure who gets which kind of message, based on how long or how often an error has occurred. In addition, reminders can be sent to make sure the situation is being noticed. See Escalation levels for more info.
In order to send a message when an alert is generated, you have to set up Alerting by integrations within the Alert definition.
The integrations for phone (voice), SMS and e-mail exist by default in the Uptrends app. Other integrations with third-party systems like Slack are predefined, but need to be set up by you. In addition you can set up a completely customized integration for your third-party system. Go to the menu item for a list of integrations in your app. If the integration exists here, you can use it within your Alerting by integrations set-up.
See What are integrations? to read about the full range of options for sending alert messages, either to people or to third-party systems. And check out the KB article Setting up a custom integration to learn more about how to send a message to a system that has no default integration definition.
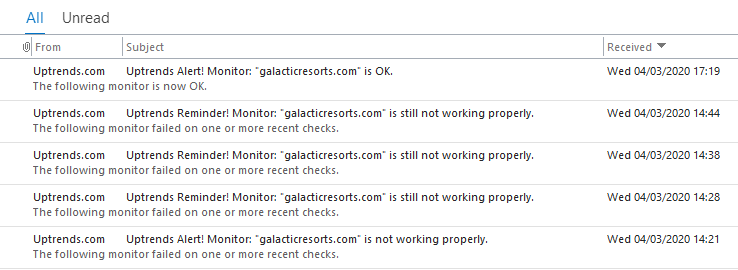
This is an example of messages sent for the same alert, by email and Slack:

Testing messages
You want to rely on that your messages are sent, when a situation occurs that needs attention.
The first step is to make sure that the sending of messages works. The KB article Testing alert messages describes for the different integrations, how to test if the messages are sent.
To check out troubleshooting tips, please visit the Troubleshoot section of the KB overview page “Alerting”.