
This article explains downloading and using the transaction recorder. If you want to try this out using a fictitious shop instead of your own (real) shop, take a look at the tutorial User journey in a shop.
Download the transaction recorder
The transaction recorder is a Chrome browser extension. If you’re unfamiliar, a browser extension is a small app that you can add to your Chrome browser to do certain things like manage passwords. In this case, it allows you to record the click-path for your transaction. The extension is simple to install, but if you need more help, Google has a course for you on installing and managing browser extensions.
- Open a Chrome browser window. You have to use Chrome.
- Go to the Chrome web store. The link takes you directly to the transaction recorder in the store, alternatively you may search the store for “Uptrends transaction recorder”.
- Click the Add to Chrome button. A pop-up window opens.
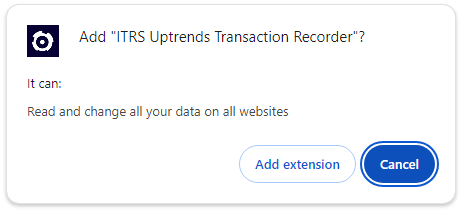
- Click Add extension. Depending on your settings you may need to enable pop-ups for the Chrome web store.
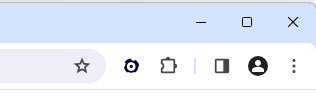
- Notice the ITRS logo to the right of the address bar in your Chrome browser after you’ve added the extension and the extension is pinned. If you did not pin (or unpinned) this extension, it can be accessed in the Extensions (piece of a puzzle icon) menu.
The transaction recorder is now ready to be used.
Using the transaction recorder
-
Open a fresh Chrome browser and disable any auto-fill options you may have running. The recorder can’t see auto-filled text.
-
Open the transaction recorder by clicking the ITRS logo located to the right of the address bar. A new window opens with detailed instructions and important guidelines.

-
Read through the Quick start and Important guidelines before proceeding.
-
Click the Start recording button at the bottom left.
You may get a pop-up explaining that your window needs resizing. Allow the recorder to resize your window.
A new browser window opens in front of the recorder window.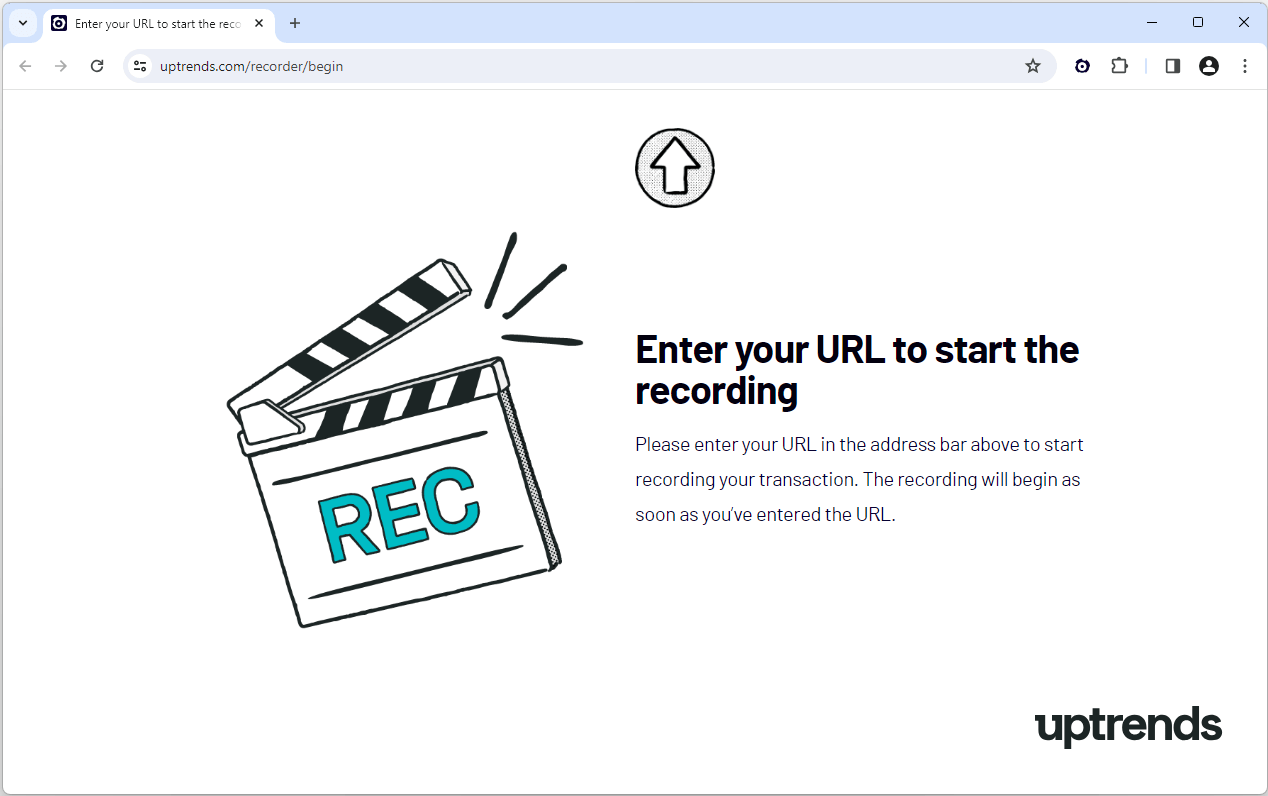
-
Navigate to your starting page by entering the URL into the address bar of the recording start window.
-
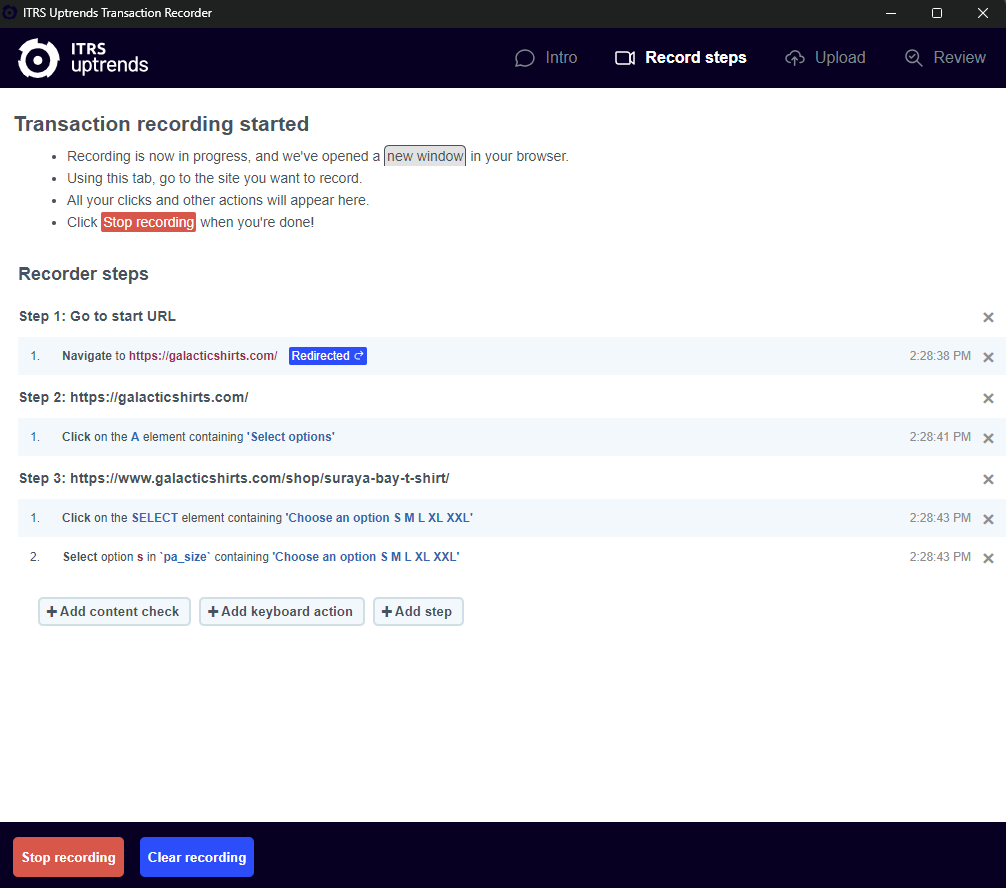
Click through your transaction to capture all the steps. You can check this step-by-step tutorial to help you begin with capturing user journey transactions.
-
Switch to the recorder window when you reached the end of your transaction.
-
Review your script.
You can remove unnecessary actions that the transaction recorder picked up as you clicked through the site. Remember, you can add steps, remove things, and define content checks using the step editor in your monitor’s settings, but you want your recording to be as clean as possible at this stage. If you feel you gathered too many extra clicks or other problems, you can always discard this recording and start over. -
Click the Stop recording button when you’re satisfied or if you want to start over.
-
(Optional) If you want to redo the recording click the Clear recording button and follow the instructions above again.
-
When you are happy with the transaction that you recorded, click the Upload recording button (which appears at the bottom right after you stop a recording).
-
Log into your Uptrends account.
-
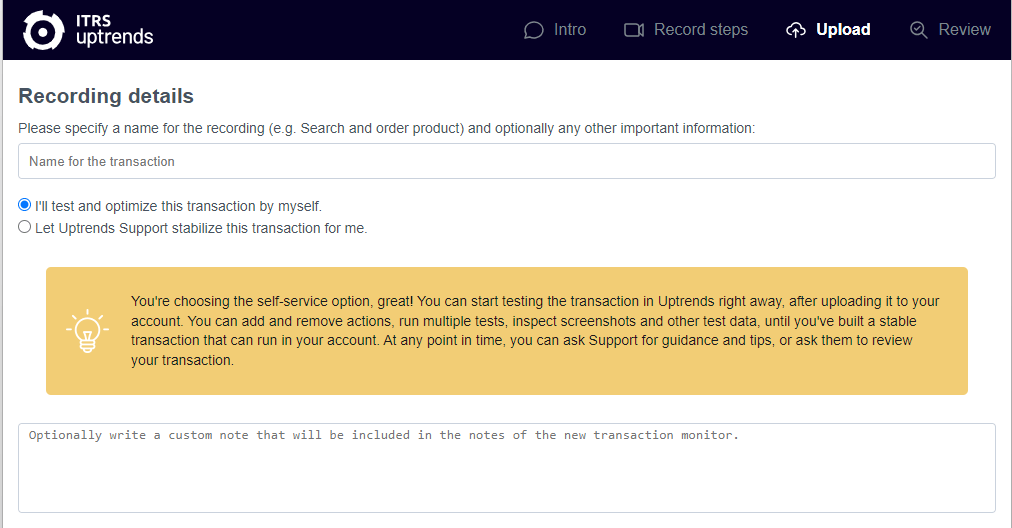
Give your recording a name that will be used for the transaction monitor that is automatically created in your account. The name helps you to identify your monitor in the Monitor overview. You can always change the monitor name later.
-
Choose if you want to use self-service or full-service transactions. The options are:
a) I’ll test and optimize this transaction by myself. - self-service transactions. Select this option if you prefer to handle things on your own. This option creates a new transaction monitor in your account. Remember, you can always get help if you need it.
b) Let Uptrends Support stabilize this transaction for me. - full-service transactions. Choose this if you want to send the recording to the support team to handle the scripting and testing for you.
-
Include any information you or the scripting pro might need in the text field.
-
Click the Start upload button to create a new monitor in your account (self-service transaction) or send the recording to the Uptrends Support team (full-service transaction).