
When adding a private location by default two checkpoints will be created. You can select the checkpoints in your private location in the Uptrends app, including them in your day-to-day monitoring setup. You will need to appoint the checkpoint for your new or existing monitor(s) on the Monitor setup page.
If you wish to edit the settings of your individual checkpoint and private location you can do so on the Private location page. The private location contains your checkpoints. When you remove a checkpoint, the location remains. Deleting a private location will remove the entire location and its checkpoints.
Start using a checkpoint
A checkpoint is not used by default or automatically. If you want to use the checkpoint(s) in your private locations, you have to add them to your monitor’s checkpoint selection list first.
To select a checkpoint for a monitor:
- In the Uptrends app go to .
- Find the name of the monitor you wish to start using the checkpoint and click on its corresponding link under the Monitor Name column. (Please note, you don’t need to select the new Multi-step API monitors with the checkpoint’s name, these are part of your private checkpoint.)
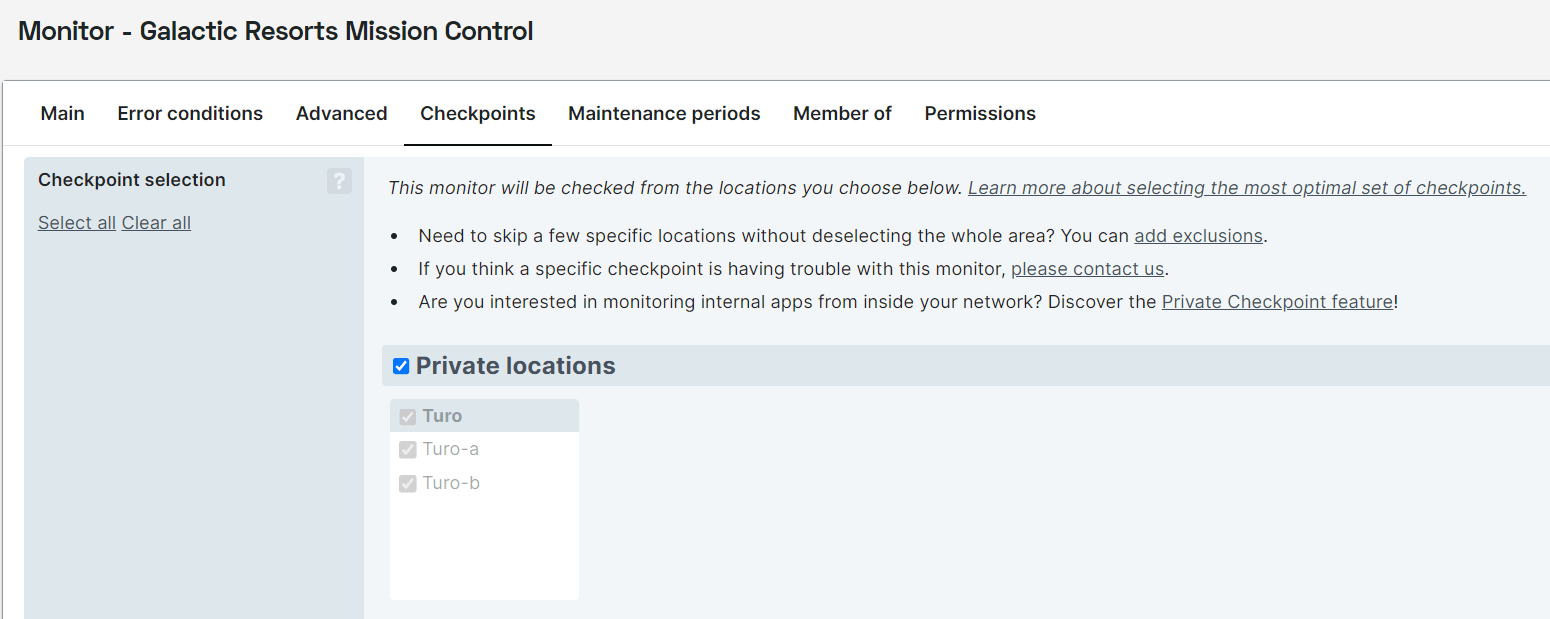
- The monitor configuration screen will open, with all your monitor settings tabs. Open the Checkpoints tab and select all checkpoints on your private location or one of the private checkpoints. (You can select this checkpoint for any new monitors you create.)
- Click the button to save all changes to the monitor.
Manage private locations
In the Uptrends app, go to . Here you can manage the checkpoints in your private location.
Renaming a private location
- In the Uptrends app, go to .
- Click the edit (pencil) button.
- Enter the new name and press enter.
Removing a private location
- In the Uptrends app, go to .
- Click the remove (trash can) button.
- Confirm the removal of the selected private location and the attached checkpoints.
- Optional: Remove the (dedicated) VM with the deleted checkpoints.
Removing a checkpoint
- In the Uptrends app, go to .
- Click the button and select Delete checkpoint. Alternatively, you can click on the name of the checkpoint, open it and click on the grey Delete checkpoint button there.
- Confirm the removal of the selected checkpoint.
Disable a private checkpoint
When you disable a private checkpoint, it is no longer available to perform checks.
- In the Uptrends app, go to .
- Click the button and select Disable checkpoint. Alternatively, you can click on the name of the checkpoint, open it and click on the grey Disable checkpoint button there.
- Enter a description of why you are disabling this checkpoint.
- Confirm the removal of the selected checkpoint by clicking .
Enable a private checkpoint
- In the Uptrends app, go to .
- Click the button and select Enable checkpoint. Alternatively, you can click on the name of the checkpoint, open it and click on the grey Enable checkpoint button there.
- Confirm the activation of the selected checkpoint by clicking .
Private checkpoint tabs
Checkpoint Health
To monitor your private checkpoint the Checkpoint health tab gives you an insight into the key metrics that impact the condition of the checkpoint. This includes information on the installed software, data protection settings, and metrics about the host.
Checkpoint installation
Use the installation guide to set up your private checkpoints in Docker: Installing a user-managed checkpoint.
How to use this checkpoint
The How to use this checkpoint tab provides a quick start to the Monitor setup page for setting up your monitors. It will only be displayed if no checks have been executed from this checkpoint yet.
Monitoring your own private location
Additional monitors in your account
It is important to make sure that there always is a private checkpoint available in your account to perform checks on your private location. If there are no points available Uptrends is unable to detect any issues in your own sites. That is; when checks cannot run, there will be no warning because they will not fail.
To be alerted to any disruptions to your private checkpoint network the following monitors will be created. Please create an alert definition to ensure that the right people are informed when a private checkpoint goes down.
| Monitor Name | Type |
|---|---|
“checkpoint <name of the first checkpoint> health” |
Multi-step API |
“checkpoint <name of the second checkpoint> health” |
Multi-step API |
“region <name of the private location> health” |
Multi-step API |
Adding new monitors
As you add monitors to your Uptrends account, please remember to configure them in your firewall.