
Zapier is an online automation tool that connects your apps and services. It allows you to connect your Uptrends alerting to virtually any other application out there. In this guide we’ll help you set up your Uptrends integration with Zapier, and where to take your Uptrends data next.
- Set up a When this happens… action in Zapier
- Set up the integration in Uptrends
- Test the webhook in Zapier
- Set up a Do This… action in Zapier
- Add the integration to an alert definition in Uptrends
Read on for detailed instructions on how to set up this integration!
1. Set up a When this happens… action in Zapier
- In Zapier, automated workflows are called Zaps. Go to Zaps and click Create Zap. Alternatively, click the MAKE A ZAP button in the top left of the screen.
- Give your new Zap an appropriate name.
- Select Webhooks by Zapier.
- Select Catch hook and click Continue.
- Take note of the Custom Webhook URL as you will need it to set up the integration on the Uptrends end later.
- Click Continue.
At this point, Zapier will ask you to test the webhook by sending data to it. In order to do this, we’ll first need to set up the Uptrends integration.
2. Set up the integration in Uptrends
- Go to .
- Click at the top right.
- Choose Zapier as the integration type.
- Specify a name for this integration.
- Paste the Custom Webhook URL you saved earlier in the corresponding field.
- Click to store your settings. The new Zapier integration will appear on the Integrations page.
3. Test the webhook in Zapier
- Go to the newly created Zapier integration in Uptrends.
- In the Customizations tab, click the button.
- Click to send a test alert to the Zapier webhook. It doesn’t matter which Alert type you select.
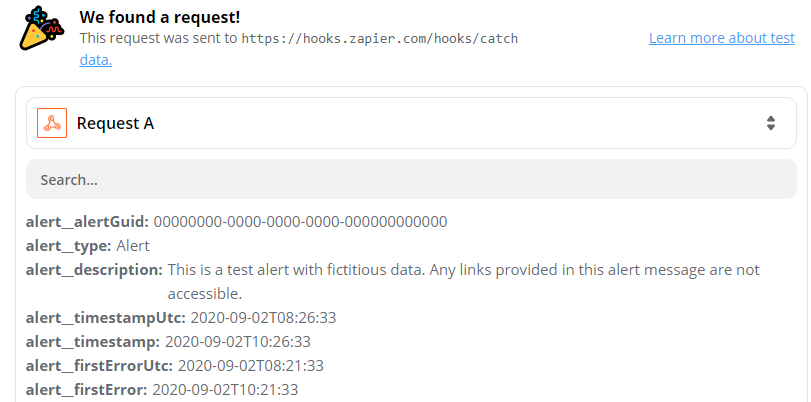
- On the Zapier end of things, click the Test trigger button. This will prompt Zapier to look at the incoming data we’ve sent in the previous step, and parse its JSON body. We’ll be able to refer to the individual fields in the outgoing message later on.
- Click the Continue button in Zapier.
4. Set up a Do This… action in Zapier
Example 1: email integration through Zapier
As an example, let’s set up a simple email integration through Zapier first.
- In Zapier, find and select the Email by Zapier Built-in App.
- Click Continue.
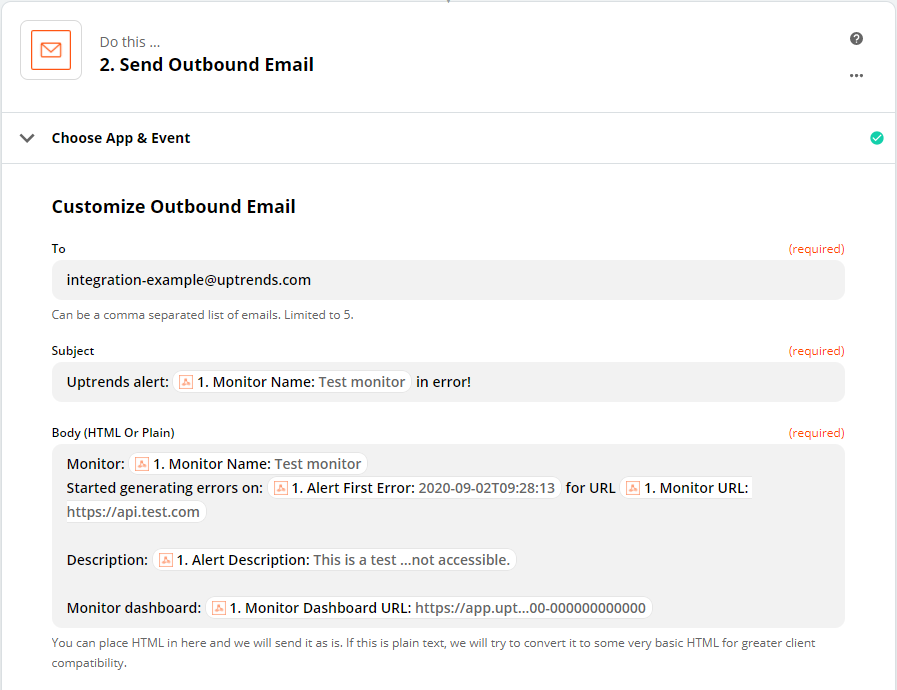
- Add your email address in the To-field.
- The Subject and Body fields may be customized using the incoming Uptrends data. Since Zapier has received and parsed a test alert in step 3, it is already aware of the data contained in incoming Uptrends alerts. When you click either field, a list labeled Insert data appears, from which you can select references to values included in an Uptrends alert. When Zapier sends the outgoing message, it will automatically fill out the correct values.
- After customizing the outbound message to your liking, click the Continue button.
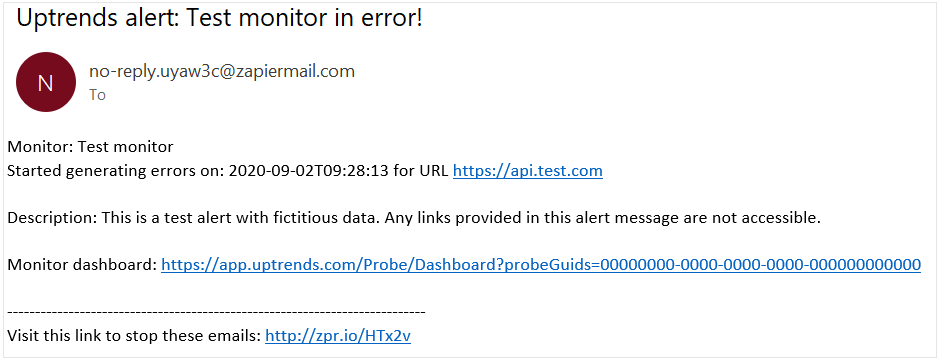
- If you wish, you can test the outgoing message in this screen. It should send you an email with fictitious data right away.
- Finish setting up the integration on the Zapier end by clicking TURN ON ZAP.
Example 2: Trello integration through Zapier
Your Zapier integration can do so much more. As a second example, let’s look at setting up an integration with Trello. You’ll need to have your Trello account connected to Zapier. You can find the option to do this under My Apps in the Zapier sidebar menu.
- Add a new Zap by following the same steps outlined in section 1 ( Set up a When this happens… action in Zapier) of this guide.
- You’ll get a new Custom Webhook URL. This new Webhook URL should be added to a separate integration in Uptrends. Follow the actions in step 2 to set up a new integration in Uptrends, but make sure you use this new Webhook URL.
- Repeat the actions outlined in Step 3 to send test data to this new webhook, so that Zapier can parse the incoming data. In short: in the Customizations tab, click the button. In Zapier, click the Test trigger button. Finish by clicking CONTINUE.
- To set up the integration with Trello, select the Trello app under Your Apps.
- You can select the exact action to take in Trello when an Uptrends alert is sent out. For this example, let’s choose Create Card. Click CONTINUE in the following screen.
- Select the connected Trello account and click CONTINUE.
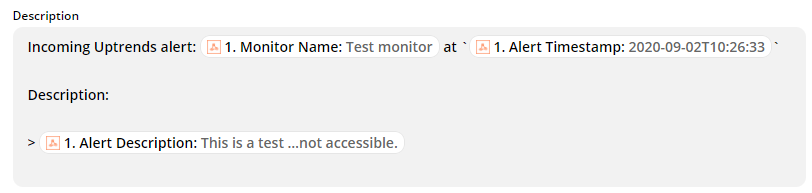
- Choose the appropriate Board and List. Set the Description for the to-be-created card. Once again you can fully customize the content here, making use of the Uptrends alerting data as previously parsed by Zapier. Set any other options you might wish, and finish by clicking CONTINUE.
- If you wish, you can test the outgoing message in this screen.
- Finish setting up the integration on the Zapier end by clicking TURN ON ZAP.
5. Add the integration to an alert definition in Uptrends
An integration definition on its own does nothing. You need to attach it to an escalation level in an alert definition in order to receive messages through it.
- Go to and open the one that you want to attach the integration to.
- Each Escalation level tab contains a section Alerting by integrations with a list of available integrations. Read the knowledge base article Alert escalation levels to learn how escalations work.
- Select the integration(s) that you would like to attach to this escalation level. In this case the Custom integration for Zapier.
- Make sure to hit the button to save your changes.
And that’s it! You’ve successfully set up the Zapier integration.
As always, if you have any questions, please reach out to our support team.