
In this example you go through the process of capturing the user journey for a user adding to and modifying their shopping cart.
The following instructions take you through a detailed example of the transaction recording process. Once the transaction monitor is active, it will use transaction credits that you have to buy in your account. This example includes information about which steps will use credits. More details about the usage of credits can be found in the article Transaction monitor credit calculations.
-
Get Uptrends' transaction recorder from the Chrome webstore and add this extension to your Chrome browser. The steps are described in Download the transaction recorder.
-
In a Chrome browser window, open the transaction recorder extension and click the button. The REC start window opens.
-
Enter https://galacticshirts.com as the URL in the address bar of the REC start window.
This is your first transition to a new page resulting in a server request (credits used = 1).
The home page of the shop is shown.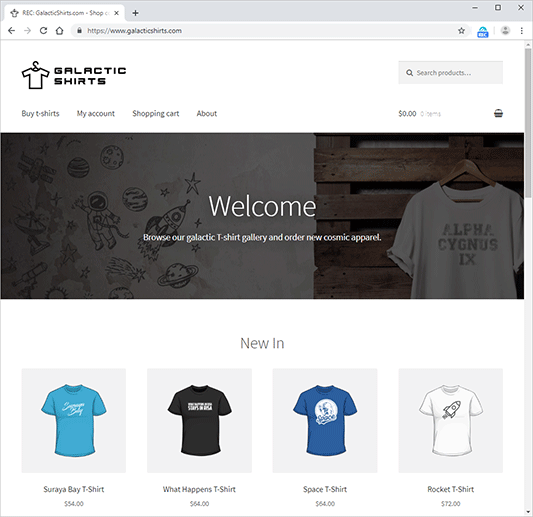
-
Click the image of the first shirt to open its product detail page.
The shirt may change, but there should always be a first shirt. In this case, the first shirt is the Suraya Bay T-Shirt.
Clicking the link means transitioning to the product detail page and making a server request. This will use another credit (credits used = 2). The product details for the shirt are shown. -
Click the Size drop-down to select size “L”.
-
Change the quantity to “2”.
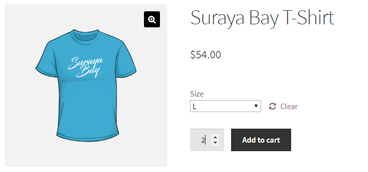 Changing the quantity by highlighting the “1” and typing “2” or clicking the up/down arrows doesn’t matter; the recorder registers the click and the change in value only.
 -
Click Add to cart.
Clicking the Add to cart button generates a server request and a page refresh using another credit (credits used = 3). -
Add a content check. For best practices, it is recommended to always add content checks to verify if the result of each page load turns out as expected. In this example, we want to make sure that the add-to-cart action worked properly (one of many content checks you should consider adding to your script). You can add a content check in three different ways, either via the Add content check button or via the context menu. You can also add content checks later on using the monitor step editor in your account.
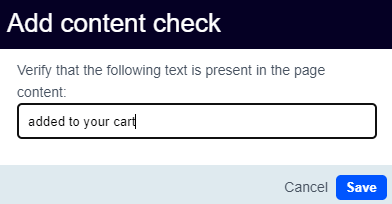
To add a content check via the Add content check button:
-
Find the recorder window (often behind your browser window) and click

-
Choose a part of the confirmation page that is unique to the page and least likely to change. In this case a good candidate is “added to your cart.” Enter this into the Add content check pop up.
-
Click .
-
Return to the recording window.
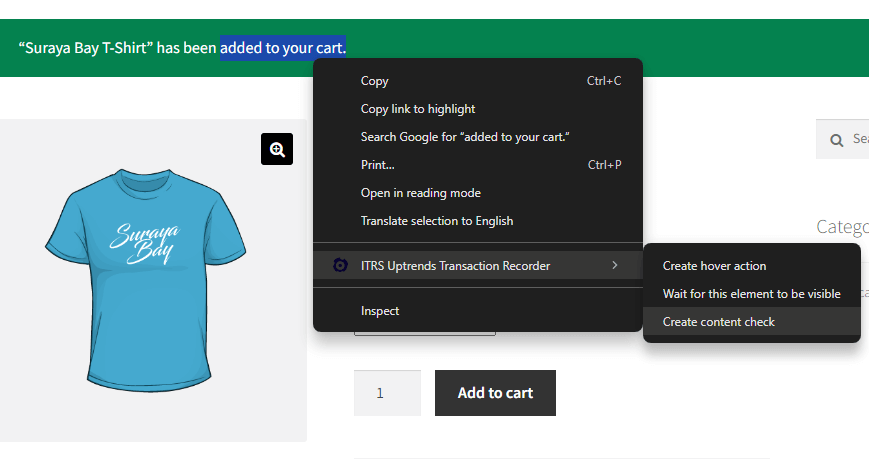
To add a content check via the context menu:
- Highlight the text “added to your cart.”.
- Right click and choose ITRS Uptrends Transaction Recorder option in the context menu.
- Select the Create a content check option. This content check is now recorded in the transaction recorder window.
- Return to the recording window.
-
The content check was now successfully recorded.
-
Click the View Cart button to go to the shopping cart view.
This uses another credit (credits used = 4). -
Change the quantity from “2” to “1.”
-
Click Update cart.
Update cart refreshes the page which generates a server request using one credit (credits used = 5).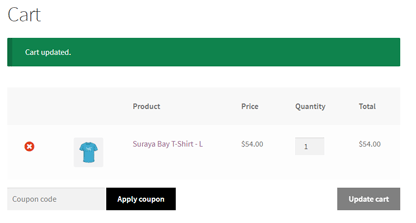
-
Add a content check to verify the page loaded correctly by testing for the text “Cart updated.”
-
Click the red “X” to remove the item from the shopping cart to finish our transaction.
Removing the item generates a server request using one credit (total credits used = 6). -
Add a content check using the phrase “Your cart is currently empty.”.
-
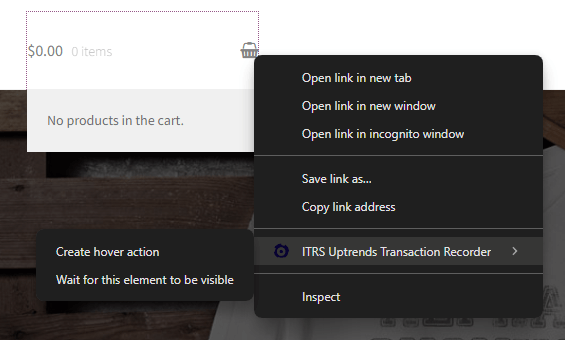
Another way to verify if your cart is empty is via hovering the basket icon at the upper right corner of your screen. Take note that the transaction recorder doesn’t automatically record a step when you hover elements in the website, therefore, you need to add it manually.
To add a hover action during the recording process:
- Right click the element in which you want to hover, in this case, the basket icon.
- In the context menu, click the ITRS Uptrends Transaction Recorder option.
- Click Create hover action. Notice that the actual step has been recorded in the transaction recorder window.
- In this example, when you hover the basket icon, a message “No products in the cart.” appears. In cases where a mouse hover makes an element visible, you can also track the activity of an element that needs to be visible. You can do this with the same approach as the hover action just by right clicking the visible element (“No products in the cart” element) > In the context menu, click ITRS Uptrends Transaction Recorder > Wait for this element to be visible.
Both the hover action and the element that needs to be visible are now recorded.
-
Add a content check using the phrase “No products in the cart.”.
-
Now that your cart is empty, you can look for another type of shirt using the search products text field at the upper right part of the screen. Type in Summer, notice that this field doesn’t contain any search button. Instead, you can press the Enter key to generate search results.
The transaction recorder can also capture such keyboard actions from the user. This is useful when you encounter websites with Press any type of key to continue or Press enter to confirm instructions. Keep in mind that compared to mouse click activities (which automatically records a move), you need to manually add a keyboard action to record any keyboard event and count it as an actual activity.
To add a keyboard action during the recording process:
- Find the recorder window (often behind your browser window):
 Click
Click - A popup will appear displaying a dropdown menu to select which key should be pressed. You can choose from a variety of characters ranging from Control keys, Special keys, Digit keys, Numpad keys, Uppercase and Lowercase keys.
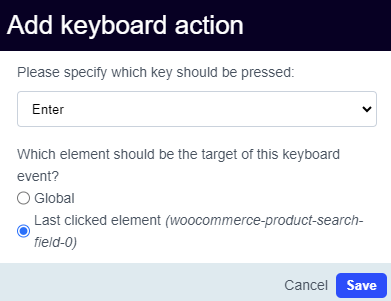
- Choose whether this key should be pressed globally or just on the currently focused element. By choosing the Global option, that specific keyboard event is recognized within the entire application. While the latter option is only applied for the last clicked element as stated inside the parenthesis of the radio button.
- Click and return to the recording browser window.
Searching a new shirt generates a server request using one credit (credits used = 7).
- Find the recorder window (often behind your browser window):
-
Add a content check to verify that the shirt does not exist by testing the text “No products were found matching your selection.”.
-
Click .
-
Click the Upload recording button and choose to test and optimize the transaction yourself first (self-service transaction). Check out the knowledge base article Options for transaction scripts on the choice between full-service and self-service transactions.
You’ve reached the end of the shopping cart user journey recording process. The result will be a new transaction monitor in your Uptrends account. You can expect your monitor to use seven transaction credits, but other factors affect the calculation of credits.
The next task is to test your transaction and make adjustments, if needed. Use the instructions in Testing and editing your transaction script to guide you through the testing.