
This article provides information on how you can migrate your existing Uptrends monitoring setup to Terraform. If you’re new to the concept of Terraform, we recommend reading the Terraform documentation for further reference.
Uptrends provides integration with and support for Terraform, a powerful Infrastructure as Code (IaC) tool that enables you to manage your entire Uptrends monitoring setup, including monitors, alerting configurations, and other resources using code.
With the Uptrends Terraform, you can:
- Easily maintain and automate your Uptrends setup using configuration files instead of managing them using either a UI-based environment or through the Uptrends API.
- Manage your configuration files with version control systems such as Git to efficiently track changes and perform rollbacks using a GitOps approach.
- Define the configuration and reuse those snippets across your structure.
- Download your existing Uptrends configuration and get started instantly.
You can find the Uptrends Terraform Registry here.
Prerequisites
The following prerequisites are required before using the Uptrends Terraform:
- Install Terraform on your local machine.
- Active Uptrends account. If you don’t have one, sign up and try Uptrends now.
- Uptrends API key. You can easily create an Uptrends API key by clicking Create your Terraform API user on the Uptrends Terraform hub. You also have the option to use your existing API keys to authenticate to Terraform.
- An IDE to manage and edit your configuration files in a code-editor. If you’re using Visual Studio Code, ensure that you’ve installed the HashiCorp Terraform extension for syntax highlighting and autocompletion.
Set up your Terraform infrastructure
To set up your infrastructure, do the following:
-
Verify that all prerequisites are met.
-
Create a directory for your Terraform configuration.
a. Inside the directory, create a file,
main.tf. -
Go to the Uptrends Terraform hub to find the initial setup instructions.
a. In Step 1: Getting started, copy and paste the configuration into your
main.tffile:
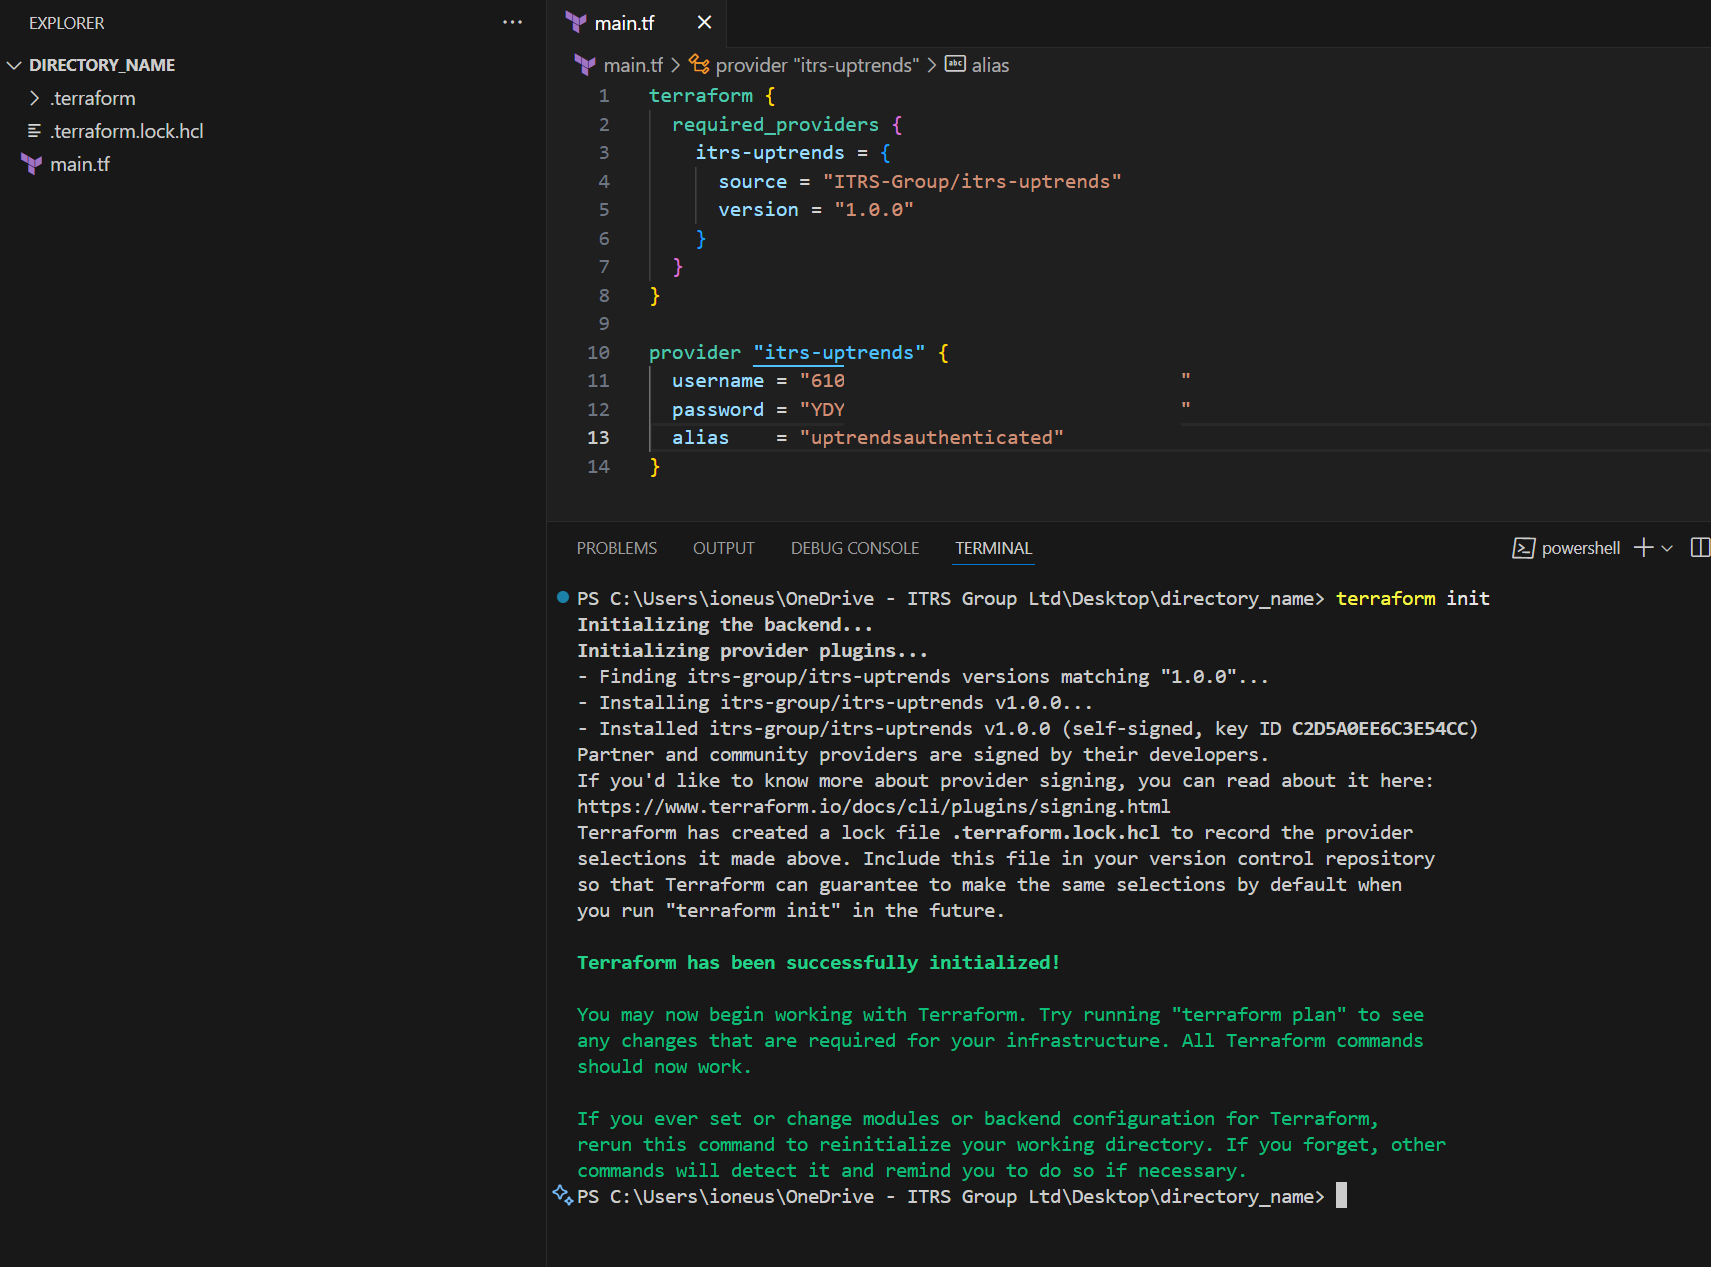
terraform {
  required_providers {
    itrs-uptrends = {
      source = "registry.terraform.io/ITRS-Group/itrs-uptrends"
      version = "1.1.1"

    }
  }
}

provider "itrs-uptrends" {
  username = "your_username" # Replace with your Uptrends API username
  password = "your_password" # Replace with your Uptrends API password
  alias = "uptrendsauthenticated"
}
If you created an API key using Create your Terraform API user, the Username and Password fields will be filled in automatically. Otherwise, use your existing API credentials in the configuration.
- Run
terraform initto initialize Terraform. A.terraform.lock.hclfile and a.terraformdirectory are added to the root directory.
Once you’ve set up your infrastructure, you can use your current Uptrends monitor setup in Terraform. To do this, import resources from the Uptrends platform.
You can also define and manage your resources by creating, updating, or destroying a resource.
Terraform Hub
The Terraform Hub is the central page in the Uptrends web application for integrating Terraform with an existing Uptrends account. It allows you to download generated .tf configuration files that represent the resources already present in your account, such as operators, monitors, alert definitions, and vault items.
Use these files with terraform import to manage existing Uptrends resources in Terraform state.
By default, access to the Terraform Hub is limited to administrators. Enable the Terraform Hub access permission to allow operators and operator groups to access this page. For more details, see Terraform Hub access permission.
Import resources from the Uptrends platform
If you want to get your existing setup from the Uptrends platform into Terraform, you can import files to add your resources to your Terraform state. In this way, you don’t need to manually create everything from scratch.
To import resources, do the following:
- Go to Uptrends Terraform hub.
- In Step 2: Import your Uptrends resources > Click Download all.
- Extract the downloaded files and place them in the root directory, same level as
main.tf. - Run
terraform plan -generate-config-out="name_of_generated_file.tf"to generate the configuration. This command allows you to preview and verify the changes that Terraform will make to your infrastructure, based on your configuration files and the current state.
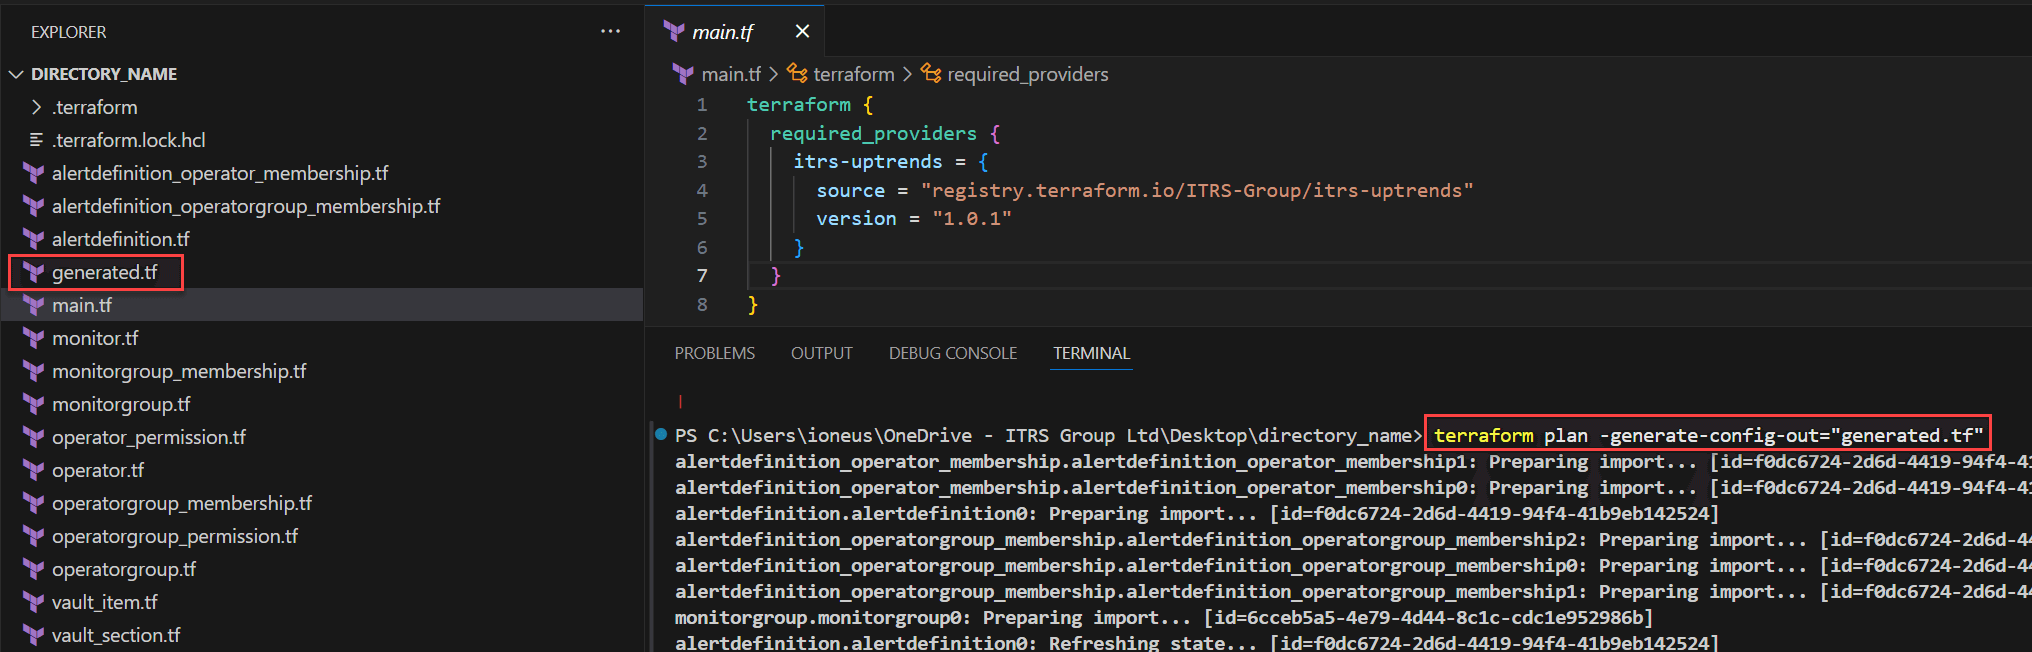
You’ll see that a new file, name_of_generated_file.tf, has been created in the root directory. This file contains the configuration for the resources that were imported.
If you want to generate separate configuration files for each resource type, process the import files one at a time and give each output file a unique name (for example, name_of_resource_type.tf).
- Run
terraform applyto confirm the import changes.
After the import is complete, you can remove the import state blocks.
- Verify that the
terraform.tfstatefile has been updated with the imported resources.
Define resources
Defining a resource in Terraform allows you to create, update, and destroy resources in your Uptrends account. You can define multiple resources in your main.tf file or in separate .tf files within the same directory.
Each resource block defines a specific Uptrends resource you want to manage. For example, alert definitions, monitor, operators, and more. Once a resource has been defined, a terraform.tfstate file is created. This tracks all resources and changes managed by Terraform.
To know more about the available resources, refer to the Uptrends Terraform documentation.
Create a resource
To create a resource, do the following:
- Add a resource block.
- Run
terraform applyto confirm changes. - Type
yesto proceed with the changes.
A message confirms that the resources were created. Verify that the terraform.tfstate file is updated with the new resources.
Update a resource
To update a resource, do the following:
- Modify a resource block according to your requirements.
- Run
terraform applyto confirm changes. - Type
yesto proceed with the changes.
If successful, you will see a message indicating that the resources have been updated. Verify that the terraform.tfstate file has been updated with the modified resources.
Destroy a resource
To destroy a resource, do the following:
- Identify the resource block that you want to remove. You can find the blocks in your
main.tffile or in other.tffiles within the same directory. - Do any of the following:
- To remove a specific resource, remove the resource block from the configuration and run
terraform apply. - To remove all managed resources, run
terraform destroy.
- Type
yesto proceed with the changes.
If successful, you will see a message indicating that the resources have been destroyed. Verify that the terraform.tfstate file has been updated to reflect the changes.
Handling breaking changes
If a new version of the itrs-uptrends provider introduces breaking changes, such as updates to attribute or resource names, you’ll need to re-import all affected resources. If the changes aren’t specifically listed, we recommend to re-import all resources to ensure compatibility.
If you’ve renamed resources, note that if a breaking change is announced during the beta phase, re-importing those resources will override your naming changes.
Troubleshooting
If you encounter any issues, run the terraform plan command to compare your current configuration with the existing Terraform state. This helps you identify discrepancies and potential problems. For more information, refer to the official
Terraform plan command documentation.
You may also reach out to our Support team and provide the following information:
- The actions you performed that resulted or caused the bug.
- The resource block configured from your
.tffile. - The resource state from your
terraform.tfstate. - The output of the
terraform plancommand.