This article provides you the step-by-step instructions on how to configure a Multi-step API (MSA) monitor. You will learn how to effectively monitor your API calls, validate API response, and customize setups based on your monitoring requirements.
Set up a Multi-step API monitor
To set up a Multi-step API monitor, these are the major tasks that you need to complete:
-
Go to Steps and in the Visual step editor, do the following:
a. Go to Request and set up HTTP request definition .
b. (Optional) Go to Pre-Request and add custom scripts that will run before sending the HTTP request to the server.
c. Go to Response and set up the HTTP response definition.
d. (Optional) Go to Post-Response and add custom scripts to validate the API response once received from the server.
-
Configure the following global settings, depending on your specific monitoring needs:
-
Set up User-defined functions to map values, use hashing, or apply regular expressions.
-
Set up Predefined variables to define variables to use within steps.
-
Set up Custom metrics to track values from the API response and monitor them automatically.
-
Set up Data protection to secure your monitoring details.
-
Configure the other monitor settings, such as Checkpoints,Member of, andPermissions according to your monitoring requirements.
-
Click Save to confirm your monitor settings.
Working with the Visual step editor
Once you’ve created your MSA monitor, navigating to the Steps shows you the Visual step editor. This is the default editor that lets you create and manage API scenarios through a UI. You can also use a code-based Script editor to create and update API scenarios using a JSON script instead of the UI.
The Visual step editor allows you to define a single or a sequence of API calls that you want to monitor, known as steps.
Steps
A monitor step consists of one round-trip call to the API, meaning, one request and one response. By default, an MSA monitor starts with one empty step.
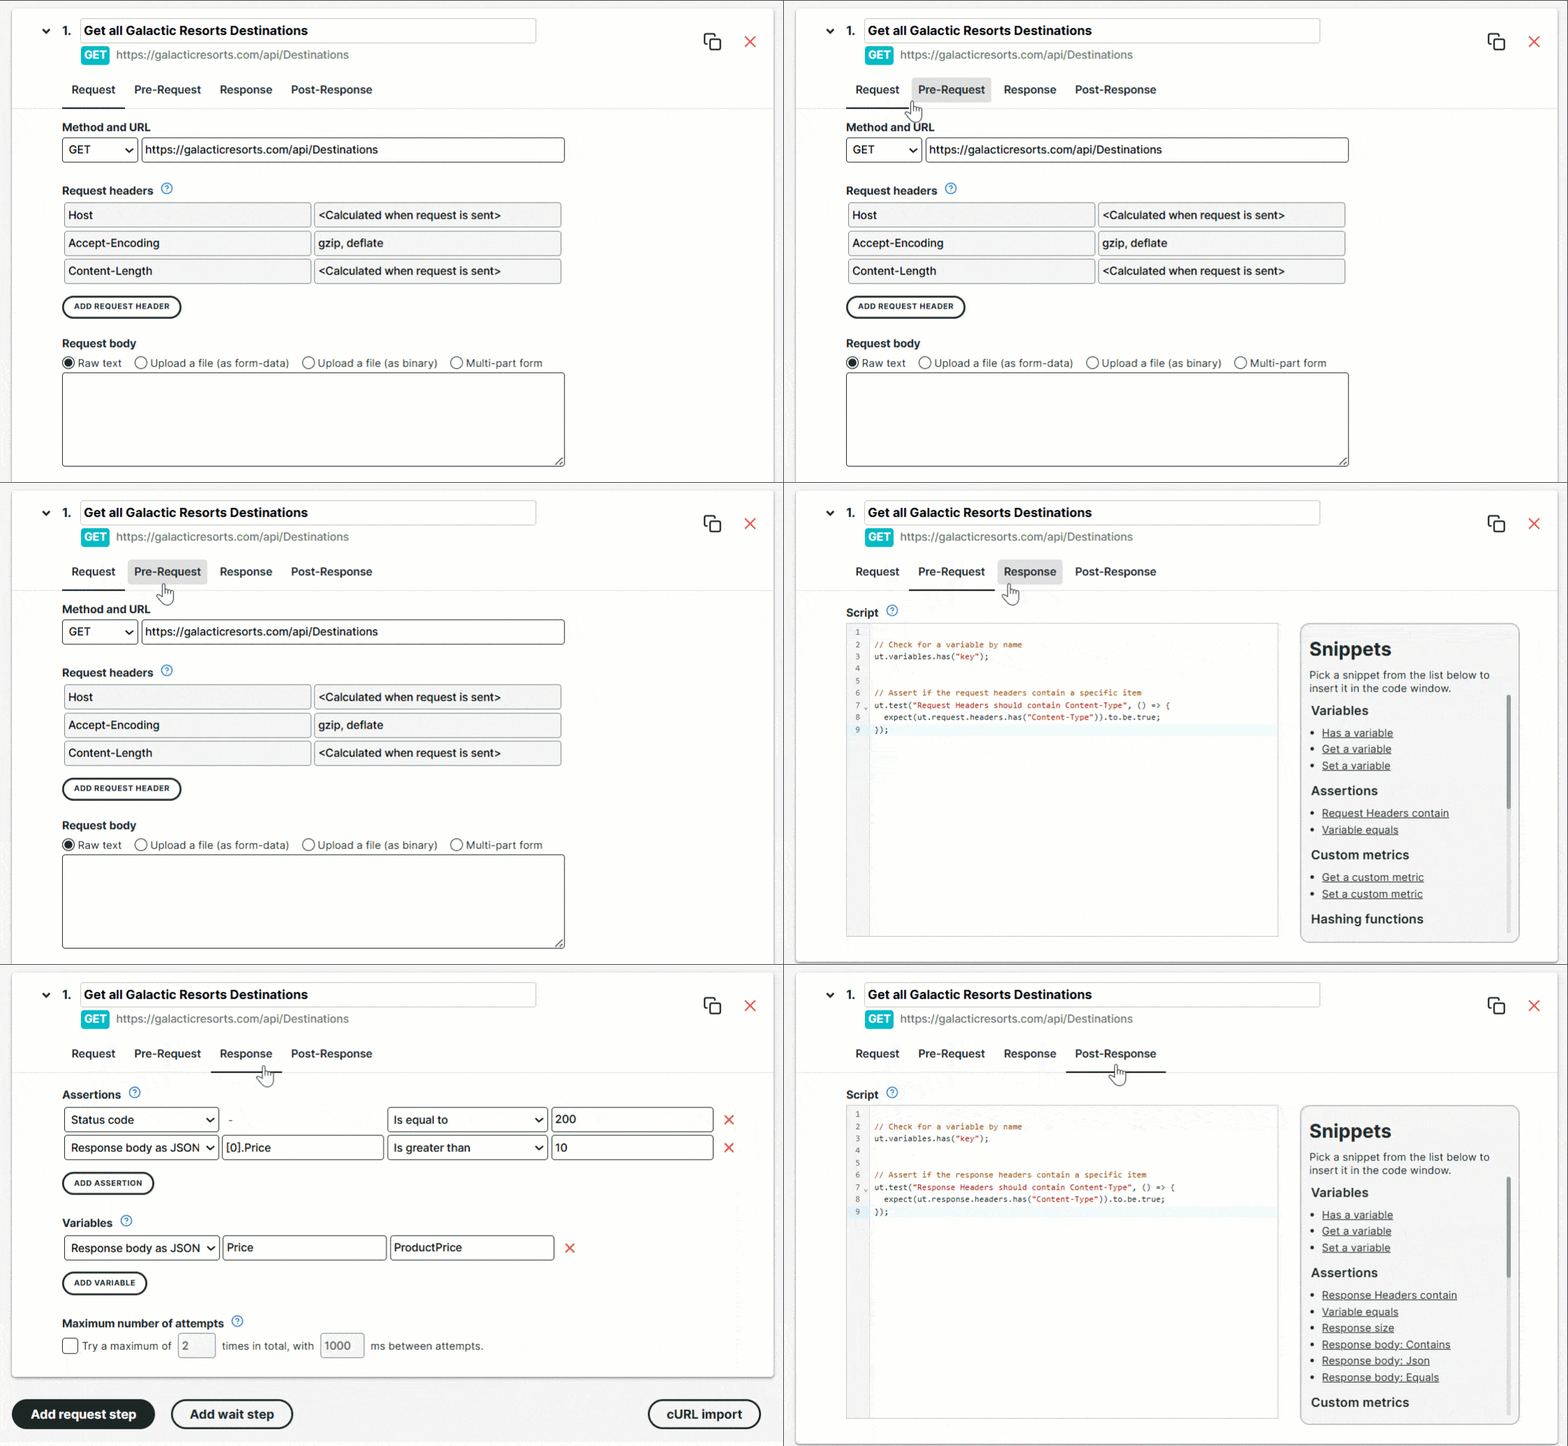
In this demo, you’ll visually learn what steps are and how to add, duplicate, delete, and arrange them. Click Learn to explore the basics of a step. You’ll also see advanced options such as configuring a wait step and importing a cURL request option.
Now that you are familiar with the basic parts of a step, you are ready to explore more about the specifics of how to configure a step.
Configure a step
Within each step, you can set specific conditions in the Request, Pre-Request ,Response , and Post-Response tabs to define how Uptrends should handle each API call.

Request tab
Lets you define API endpoints and set specific information when sending the request to the server. For more information, refer to the Request overview knowledge base article.
Pre-Request and Post-Response tabs
Allows you to write custom scripts to add logic, perform in-depth functional tests, and handle advanced API behaviors. For more information, refer to the Custom scripting in Pre-Request and Post-Reponse script editors knowledge base article.
Response tab
Lets you verify and perform checks on the response of each API step by defining assertions, variables, maximum number of attempts, and more. For more information, refer to the Response overview knowledge base article.
Configure a Wait step
When you add multiple request steps to your monitor, each step runs immediately after the previous one finishes, without delay. This immediate execution may be too quick for some scenarios.
Consider an API method that initiates the generation of a report file. This call starts a backend process to generate the file and instructs the monitor to send a second request to download the newly created file. Generating the file may take a second or two, so the monitor should wait for a few seconds before sending the second request. If the second request is sent too soon, it will fail since the generated file isn’t ready yet.
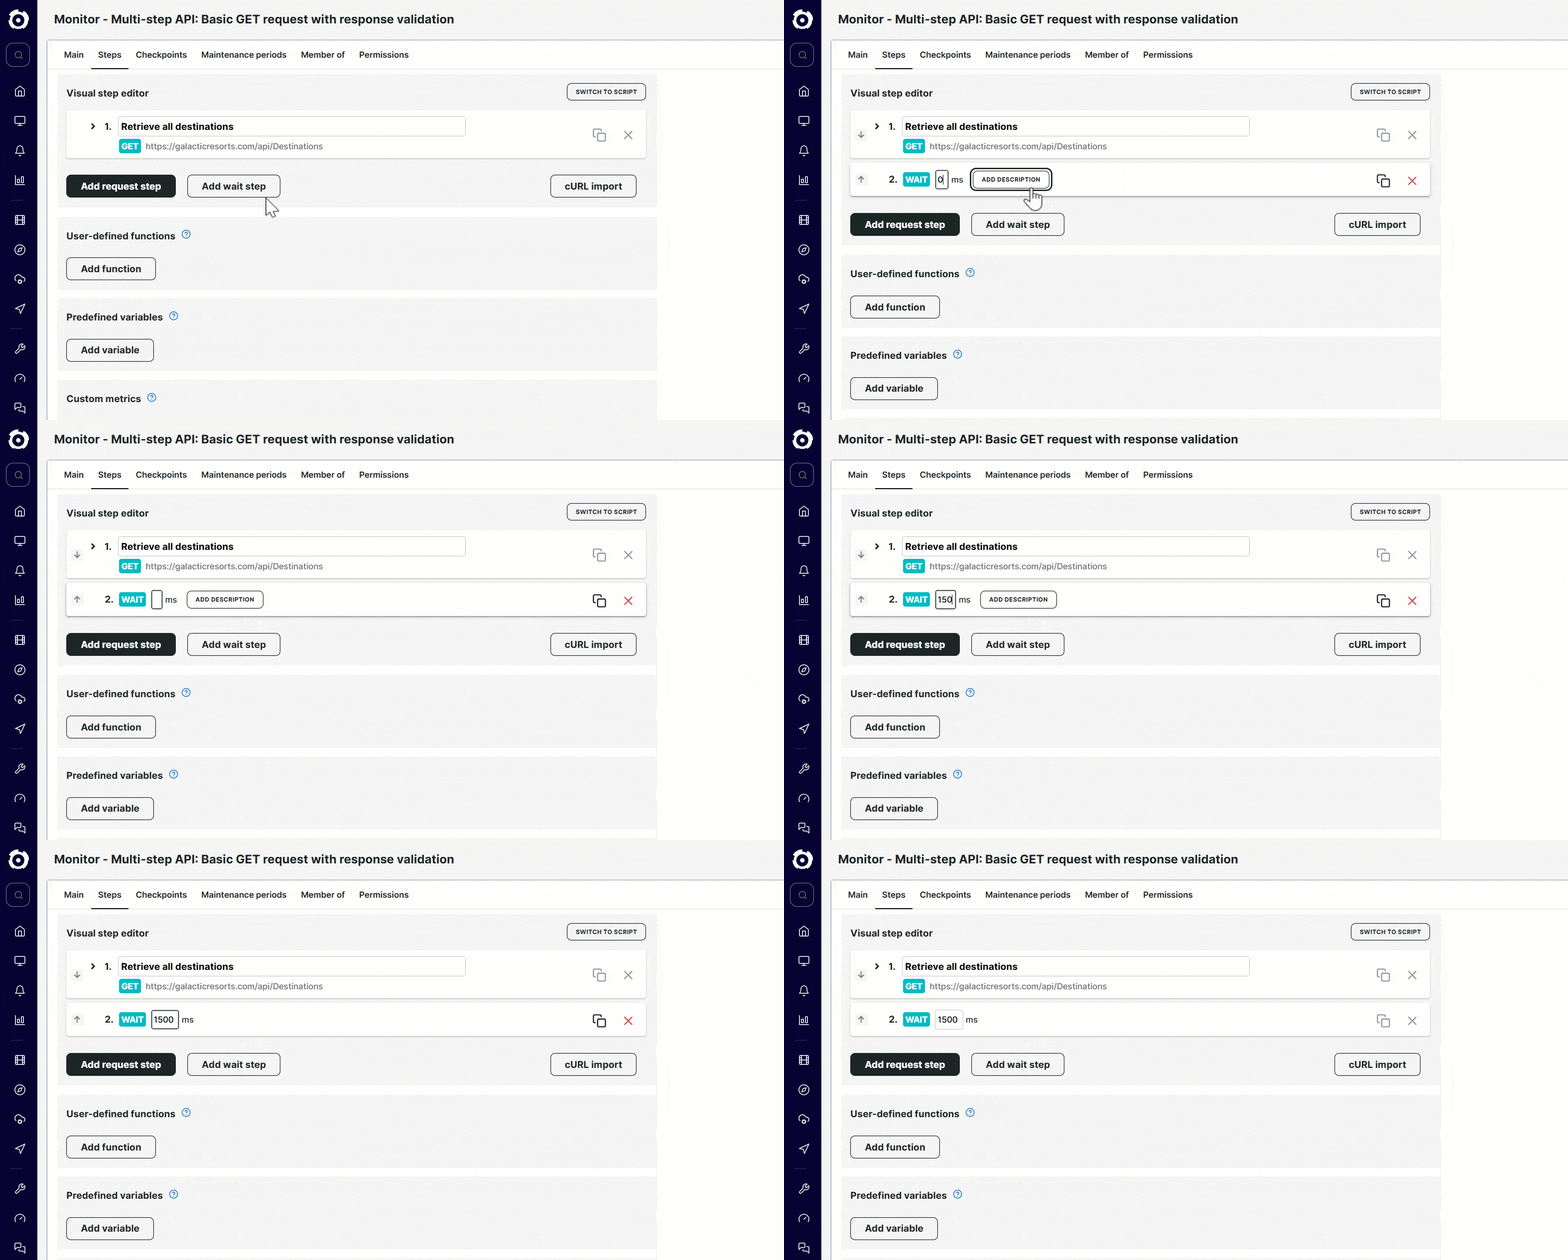
For this scenario, it’s important to wait before the second request is executed. To do this, you can insert a separate wait step. A wait step allows you to specify the time interval to wait in milliseconds before executing the next step. This wait time will be included in the total time metric for this monitor.

To add a wait step:
- Click Add wait step.
- Specify the wait time in milliseconds. For example, to wait for 3 seconds, specify 3000.
- If necessary, you can move the wait step to the right order in your scenario using the Move step up or Move step down buttons.
The wait time is limited to 60 seconds (60,000 milliseconds) because the monitor is not intended for long-running tasks that take several minutes or hours. If the monitor exceeds its maximum total running time, the check stops and reports a failure. All steps in your monitor must finish within four minutes in total. If execution takes longer than four minutes from start to finish, the monitor check returns an error. In such cases, consider distributing your requests across multiple monitors.
Adding wait steps are free, the cost of a Multi-step API monitor is only based on the number of request steps. For more information, refer to Calculating credits.
Import cURL requests
cURL or Client URL is a command-line option that you can use to make HTTP requests. It is possible to directly import cURL requests in a Multi-step API monitor to automatically create monitor steps. Each cURL statement will generate a step that you can review and edit once imported.

To import cURL request, follow these steps:
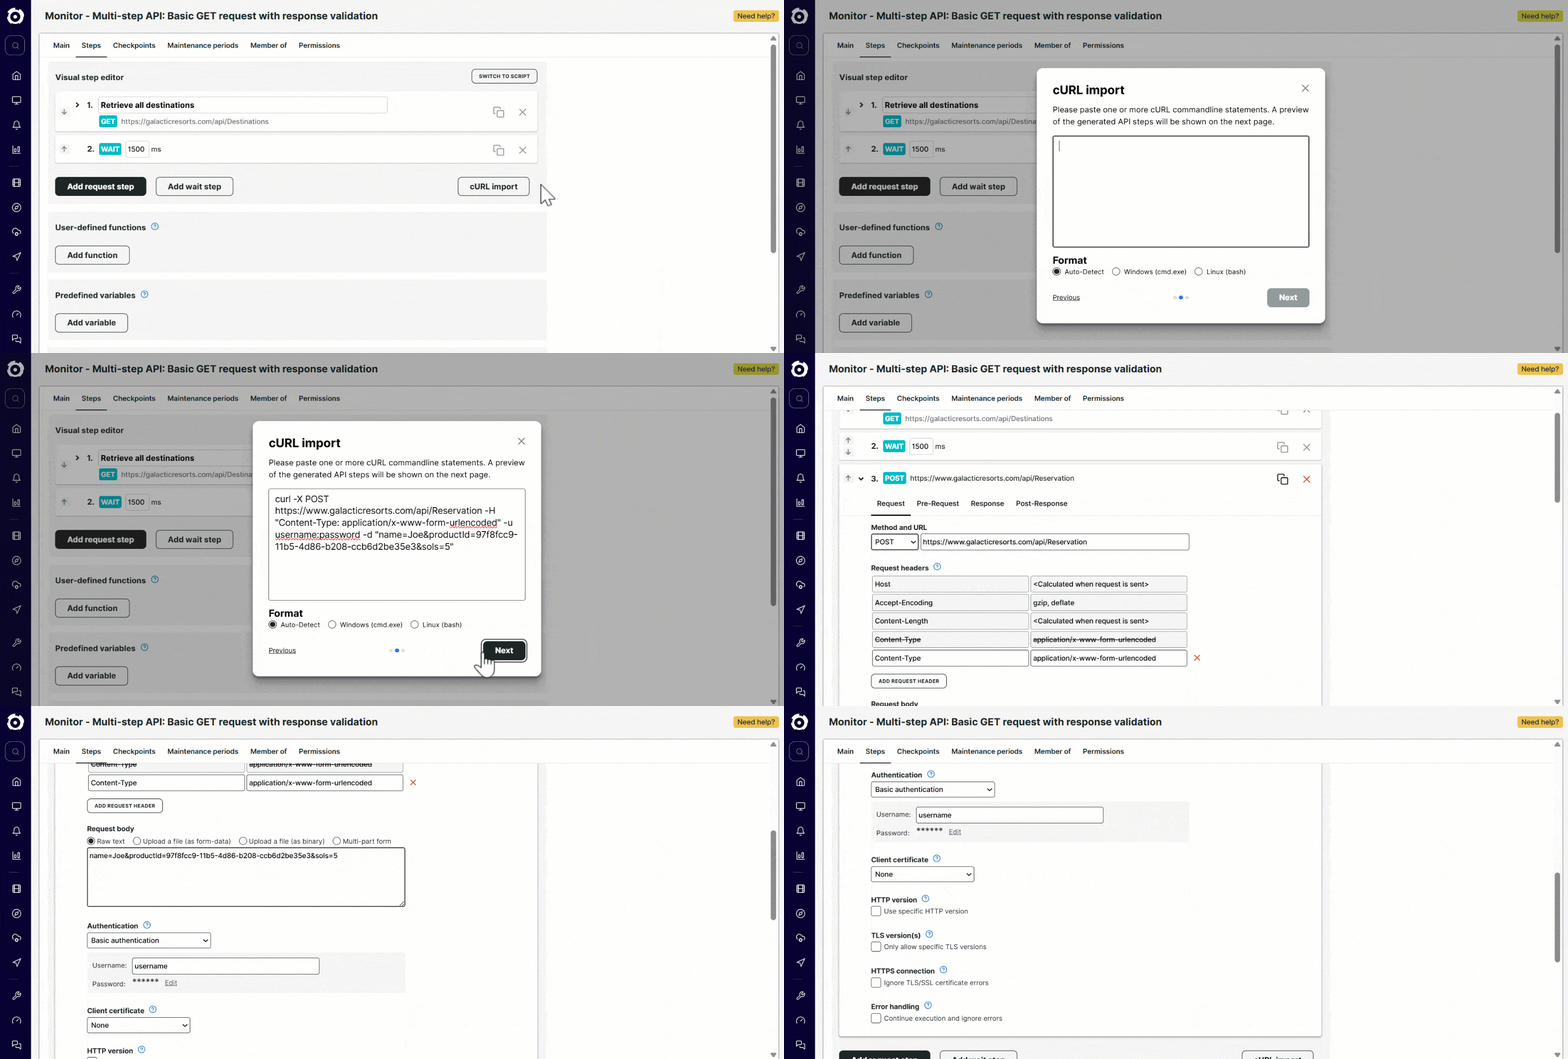
- Go to the Steps > Visual step editor and click cURL import.
- A popup appears, showing the cURL import instructions. Click Next.
- Paste your cURL command line statements. Below is an example of a cURL statement that creates a reservation on Uptrends mock holiday booking testing site., GalacticResorts.com:
curl -X POST https://www.galacticresorts.com/api/Reservation -H "Content-Type: application/x-www-form-urlencoded" -u username:password -d "name=Joe&productId=97f8fcc9-11b5-4d86-b208-ccb6d2be35e3&sols=5"
You can add multiple steps at once by pasting multiple cURL statements.
- (Optional) Specify the command format. By default, Auto-Detect is the selected format. You can also select other options, such as Windows (cmd.exe) or Linux (bash).
- Click Next.
- Click Generate steps to confirm your cURL command and automatically generate a monitor step.