
Manage private locations
You can manage your private locations and checkpoints from the Private locations menu in the Uptrends web application.
Add private locations
To add a private location:
- Click Add location.
- Enter the name for the new private location.
- Select the monitor group to track. This creates a health monitor for the private location status.
- Click Add private location.
Once created, two unconfigured and uninstalled checkpoints are added by default. You can install and host these checkpoints on servers to run monitoring checks within your network. You can also add more checkpoints later.
Rename a private location
- Click to edit the name.
- Enter the new name.
- Press Enter to save.
Remove a private location
- Click to delete a private location.
- Click Confirm.
All associated checkpoints will also be deleted.
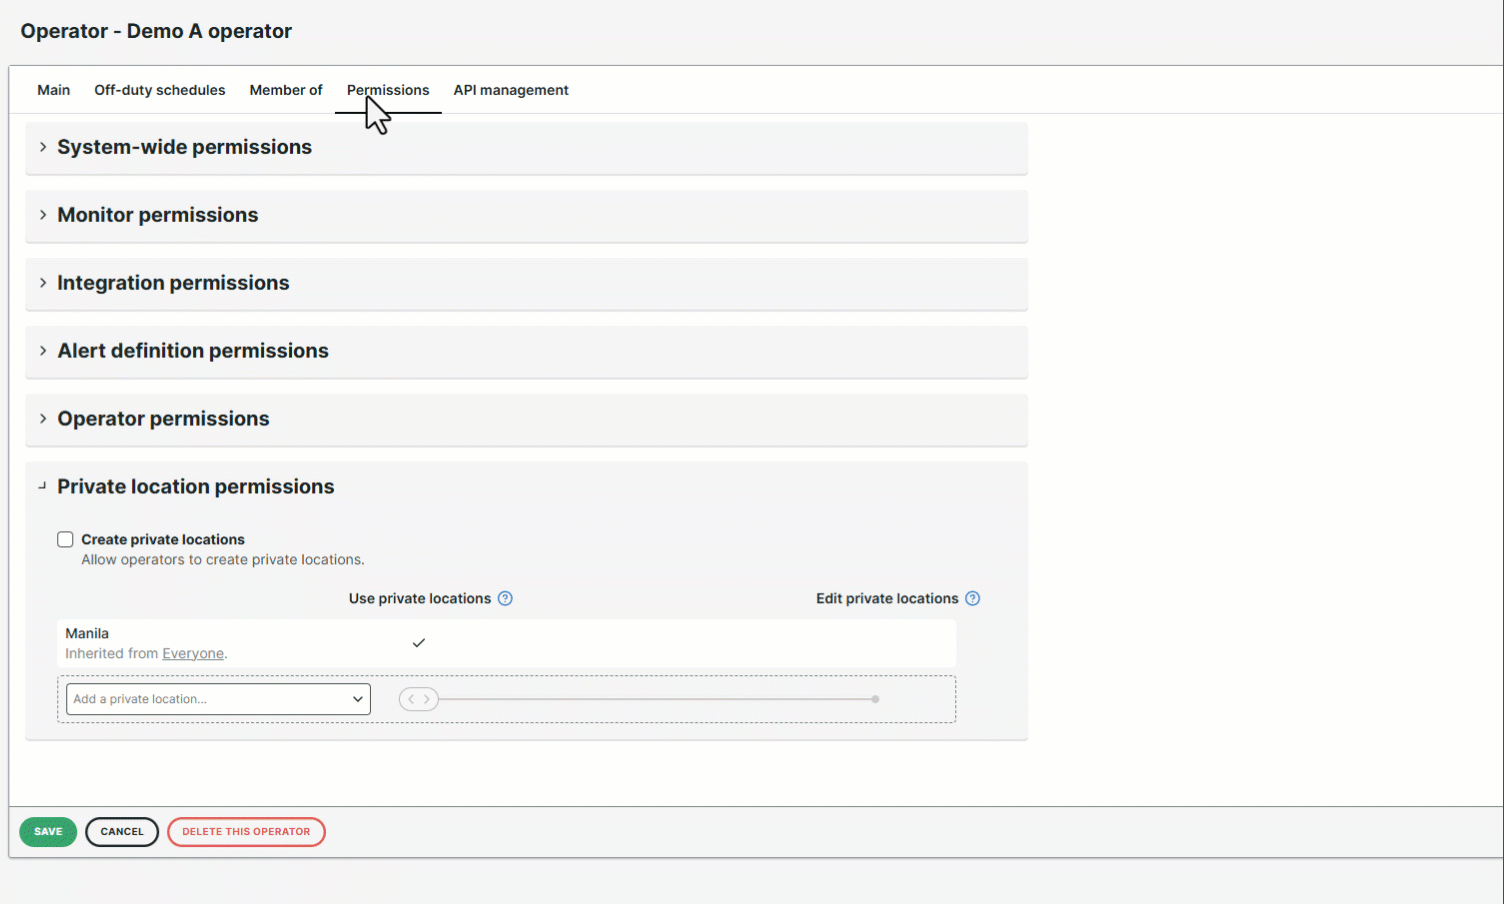
Set private location permissions
Operators and operator groups may have different levels of access to private locations and their checkpoints. Controlling these permissions is essential for security and privacy.
To manage private location permissions:
- Go to Account setup > Operators and groups.
- Select the operators or groups to manage permissions for.
- Go to the Permissions tab.
- Select whether operators and groups can:
- Create private locations — view and create private locations.
- Use private locations — use private locations as checkpoints for monitors.
- Edit private locations — access, edit, and delete private locations, and assign checkpoints to their monitors.
Administrators have full access to permissions by default. Operators with Use or Edit permissions can add private locations as checkpoints in the monitor Checkpoints tab. Those with Create or Edit permissions can access the Private locations menu.
Manage private checkpoints
Install private checkpoints
After creating a private location, two unconfigured checkpoints are added by default. To install and host these checkpoints on your servers, see Install a Docker checkpoint.
Add a private checkpoint
You can add more private checkpoints to your location as needed:
- Go to Private locations.
- Click Add checkpoint.
- Select the monitor group to track. This creates a health monitor for the private location status.
- Click Add checkpoint.
The checkpoint is now created in the Uptrends web application. To activate it, you must install the checkpoint on your server.
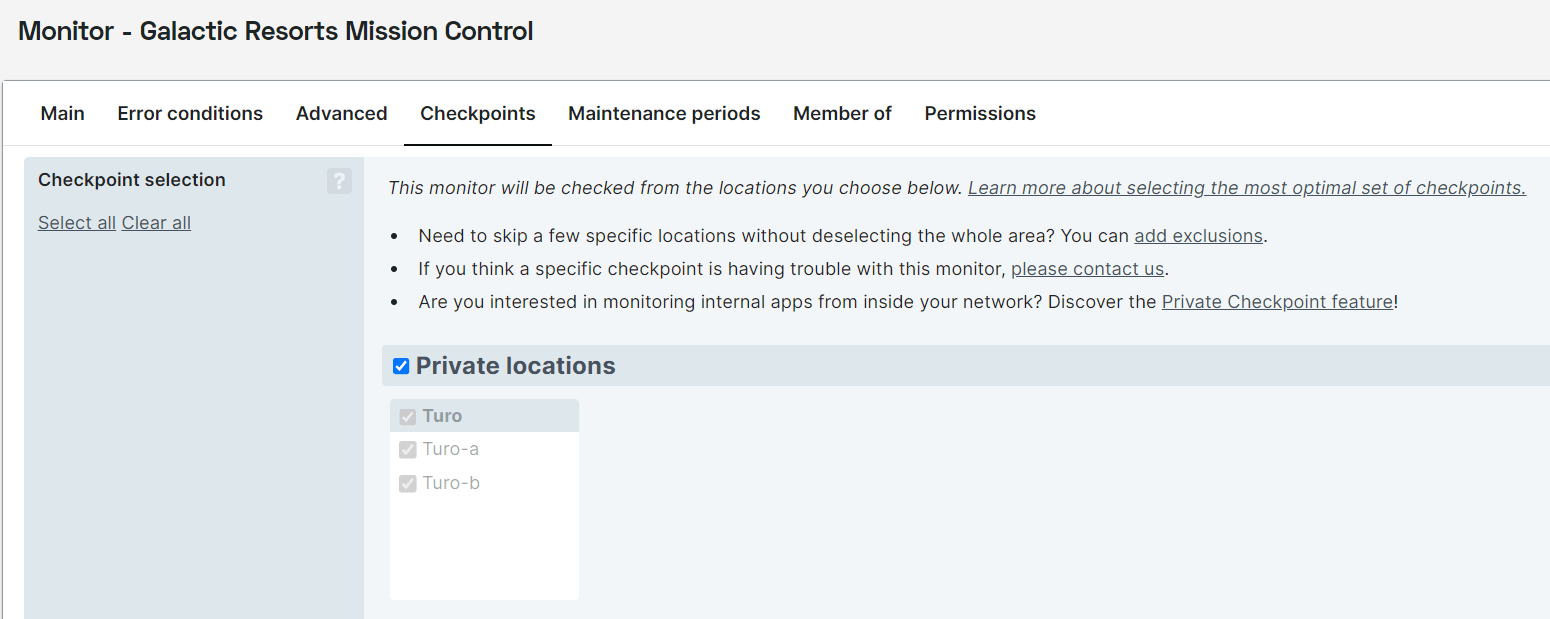
Use a private checkpoint in a monitor
Private checkpoints are not selected by default. You must manually add them to your monitor’s checkpoint selection.
- Open your monitor editor.
- Go to Checkpoints and enable Private locations.
- Select one or more private checkpoints.
- Click Save to confirm your changes.
Disable a private checkpoint
You can disable a private checkpoint in two ways:
- Hover over a private checkpoint.
- Click the button, then select Disable checkpoint.
Alternatively, you can:
- Click the checkpoint.
- Click Disable checkpoint.
- Provide a description of why you’re disabling the checkpoint.
- Click Disable.
The checkpoint is disabled and unavailable for monitoring.
Enable a private checkpoint
You can enable a checkpoint in two ways:
- Hover over a private checkpoint.
- Click , then select Enable checkpoint.
Alternatively, you can:
- Click the checkpoint.
- Click Enable checkpoint.
Remove a private checkpoint
You can remove a private checkpoint in two ways:
- Hover over a private checkpoint.
- Click button, then select Delete checkpoint.
Alternatively, you can:
- Click the checkpoint.
- Click Delete checkpoint.
- Click Confirm.
The checkpoint is removed, but the private location remains. Deleting a private location deletes all associated checkpoints.
Monitor your own private location
Depending on your network setup, you might need to adjust your firewall to let private locations reach the monitored services.
Always ensure that at least one private checkpoint is available, so Uptrends can monitor your private location. Without available checkpoints, checks will not run, and no alerts will be triggered.
To receive timely alerts about issues with your private checkpoint network, Uptrends automatically creates monitors listed below to track the status and health of your private checkpoints. Make sure to create an alert definition to get notified and informed if a checkpoint goes down.
| Monitor | Type |
|---|---|
| Checkpoint monitor | Multi-step API |
| Region or location monitor | Multi-step API |
Troubleshooting
For more troubleshooting tips, see Troubleshoot private locations and Troubleshoot private checkpoints.