
Configure OpenTelemetry export
To configure OpenTelemetry export in Uptrends, do the following:
-
Log in to Uptrends as an administrator.
-
Go to the OpenTelemetry export menu. This opens a setup page for first-time setup.
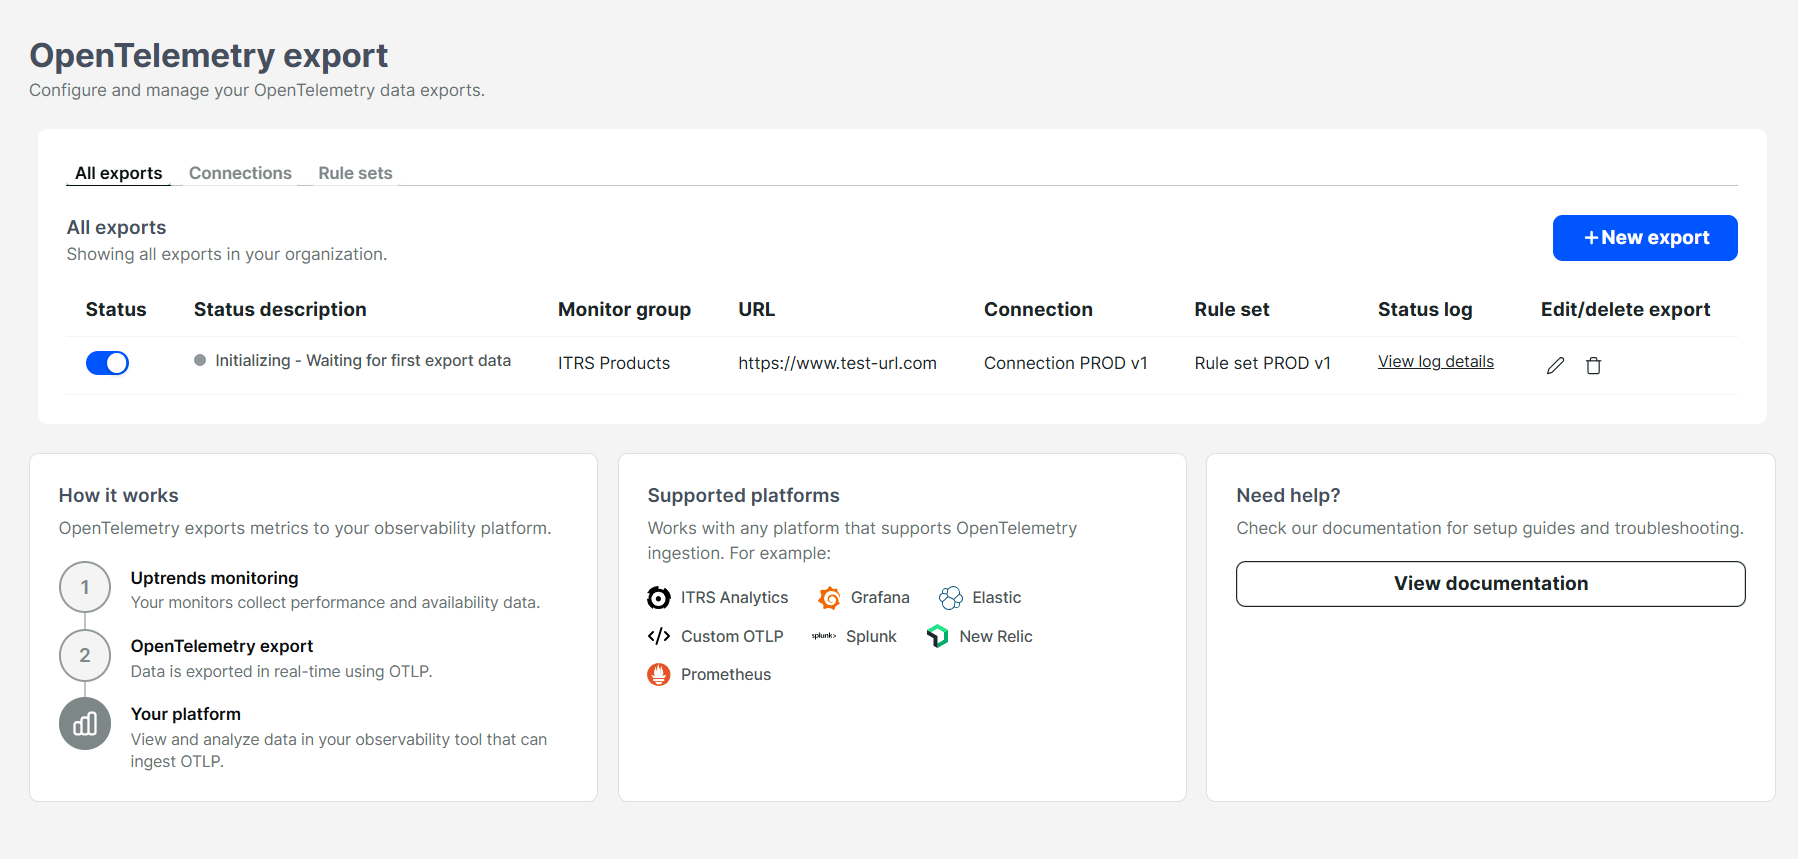
Once your initial setup is completed, you can manage exports, connections, rule sets, and monitor groups from the OpenTelemetry export page. You may also create a new export by clicking +New export.
Create a connection
You can create a connection in two ways:
- First-time setup page: Opening the OpenTelemetry export menu for the first time opens the setup page to configure your initial connection.
- From the Connections tab: Create a connection anytime on the OpenTelemetry export menu > Connections tab > +New connection.
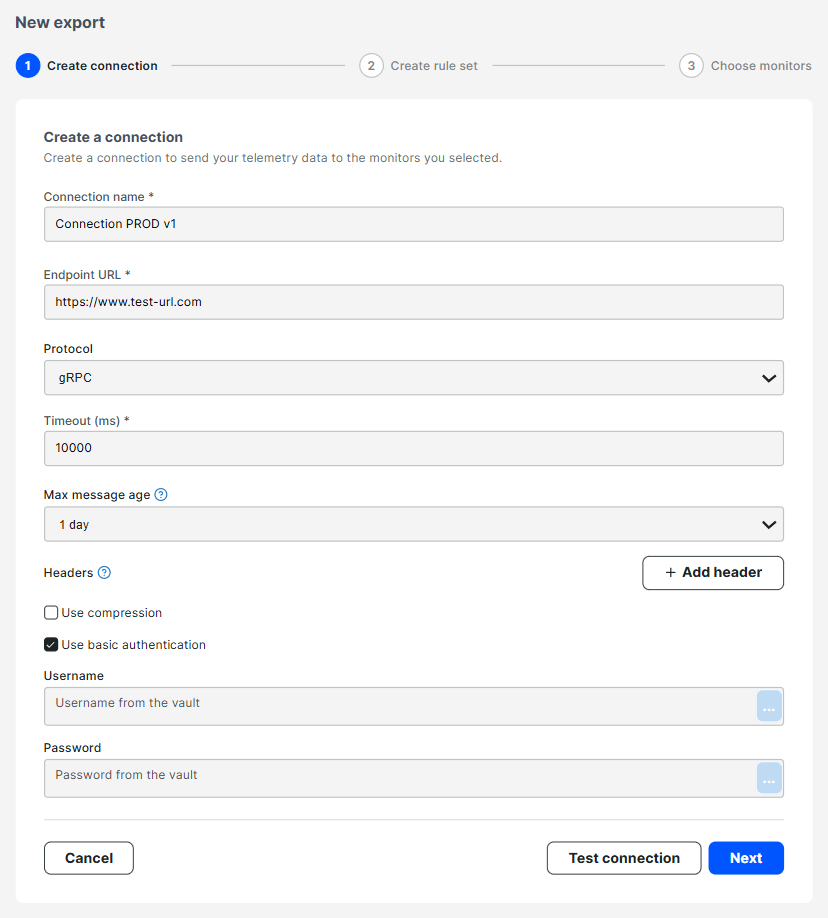
To create a connection, do the following:
- Provide a connection name.
- Provide the OpenTelemetry endpoint URL.
- Select the protocol supported by your connector and allowed by your network configuration.
- Provide the timeout in milliseconds.
- Select the maximum message age.
- (Optional) Configure headers:
- Enable Use basic authentication if required. You can use the Uptrends Vault to store credentials such as username and password.
- If your connector requires token-based authentication, add a custom header.
Test connection
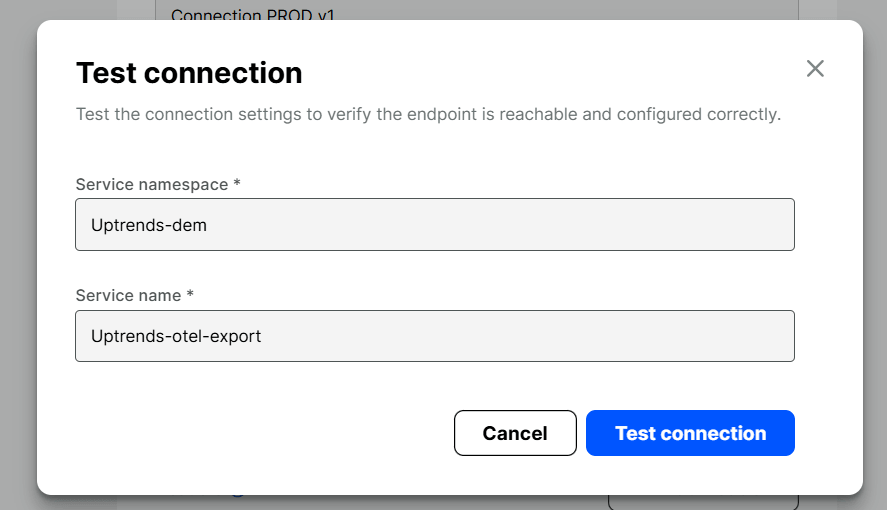
To verify that your connection works, do the following:
- Click Test connection.
- Provide a service namespace and service name. They apply only to this test request and do not affect your export configuration.
- Click Test connection. The result of the HTTPS request is displayed.
If the connection test succeeds, your observability platform should receive an OpenTelemetry trace from this test.
Create a rule set
A rule set can be created in two ways:
- First-time setup page: Opening the OpenTelemetry export menu for the first time opens the setup page to configure your initial rule set.
- From the Rule sets tab: Create a rule set anytime on the OpenTelemetry export menu > Rule sets tab > +New rule set.
You may create multiple rule sets to scope data differently (for example by namespace, service name, or instance ID).
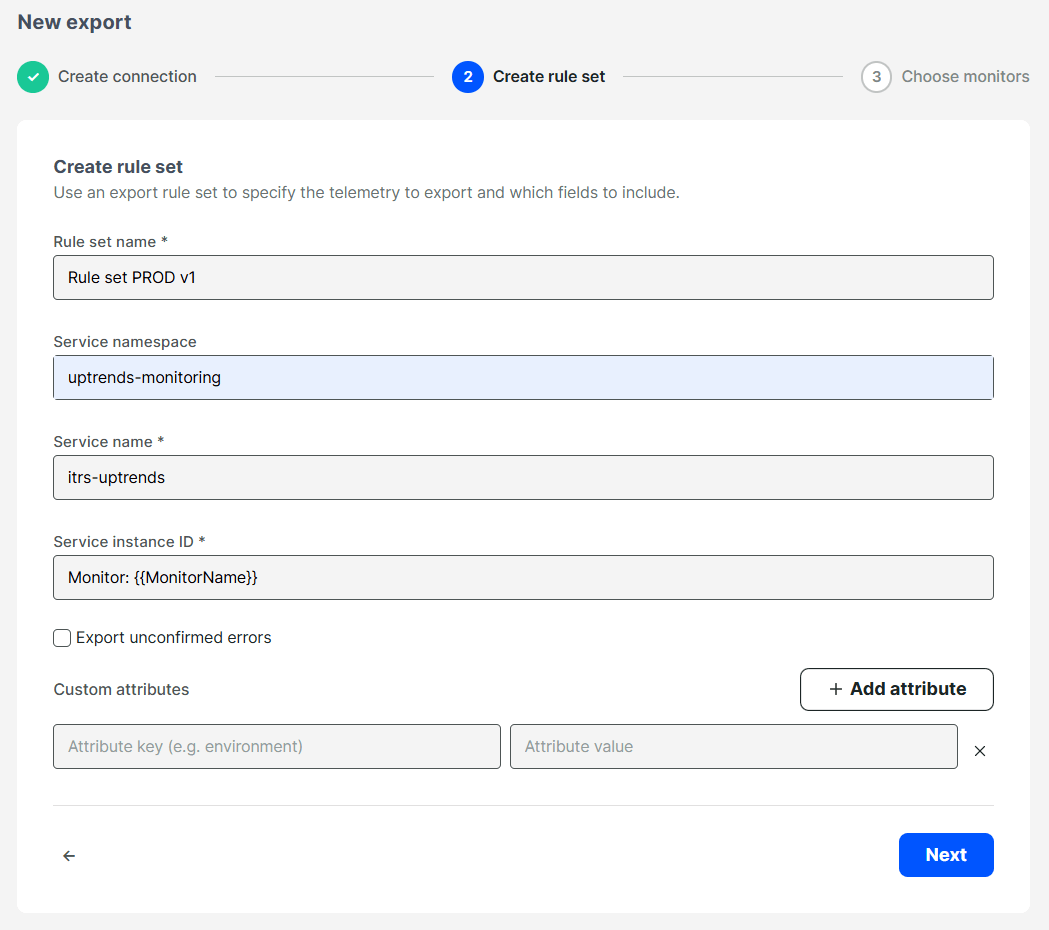
To create a rule set, do the following:
- Provide a rule set name.
- Provide a service namespace.
- Provide a service name.
- Provide a service instance ID. We recommend using the
{{MonitorName}}token to automatically replace it with the monitor name. - (Optional) Enable Export unconfirmed errors.
- (Optional) Define custom attributes in key-value pairs to add properties to the exported data.
Choose monitors
To complete the setup, do the following:
- Select a monitor group to export metrics from.
- Click Enable export.

This creates and enables an OpenTelemetry export for your monitor group. Once configured, you can see one enabled export on the OpenTelemetry export page.
From this page, you can manage, enable, or disable exports for each monitor group at any time to control which monitoring data is sent to your OpenTelemetry backend.
Manage exports
To manage exports and their associated connections and rule sets, go to the OpenTelemetry export page.
Enable export
Data is delivered to your OpenTelemetry endpoint only for monitor groups where export is enabled.
On the OpenTelemetry export page, confirm the following before you enable export using the toggle icon:
- Your connection works.
- You have at least one rule set.
- You selected a monitor group with active monitors. We recommend starting with a small group for testing.
Only data gathered after export is enabled is sent to your backend. Historical monitoring data is not exported. After monitors produce new measurements, those should appear in your observability platform.
Allow up to five minutes for the first data to arrive. After that, data is typically delivered within seconds to one minute.
Edit export, connection, or rule set
- Click the edit icon next to the export, connection, or rule set you want to edit.
- Update the fields as needed.
- Click Save to confirm changes.
Delete export, connection, or rule set
Removing an export stops sending Uptrends monitoring data for that monitor group to your OpenTelemetry backend. It does not delete the connection or rule set referenced by that export. Those still remain on the Connections and Rule sets tabs for reuse.
To delete an export, connection, or rule set:
- Click the delete icon next to the export, connection, or rule set you want to remove.
- Click Save to confirm changes.
Troubleshooting
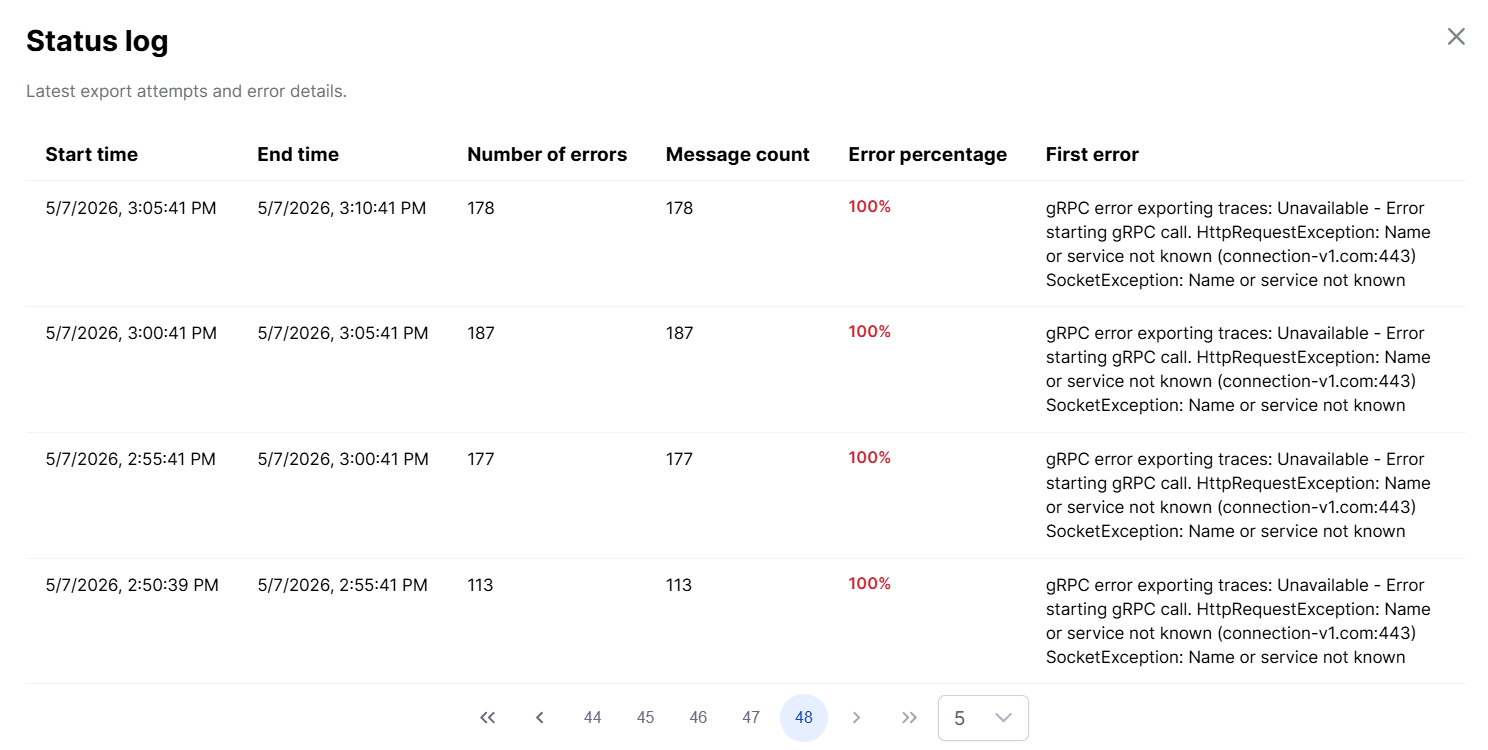
To inspect activity and troubleshoot issues, go to the OpenTelemetry export page and click View log details. This lists error counts and descriptions so you can better understand what failed. Adjust connections, rule sets, or your observability backend as needed.
If you still need help, contact Uptrends Support.